¶ Dispatcher Manual
Updated on: October 4th, 2022
¶ Dispatcher
A Dispatcher is a crucial operator enabling smooth and successful PTT experience. Dispatcher is either a person or a service team that is responsible for receiving messages, calls, and location information to organize the field personnel and units as effectively as possible. The role of a proactive and always-available dispatcher is especially important in case of an emergency.
¶ Areas of responsibility:
- Proactive service & field planning
- Critical field observation
- Field user management
- Service efficiency management
- Service implementation
- Emergency follow up
Dispatcher must practice efficient and low-threshold communication with both the field users as well as the Domain Admin. Dispatcher, representing the practical implementation of the service and constantly observant ‘brains’ behind the project manager’s plan. Therefore, Dispatcher is playing the most important role in ensuring the best practice of PTT technology to serve the company’s interests.
Dispatcher must not settle under a given job description, but observe, analyze, and suggest better practice options according to the messages, voice and movements monitoring. Hereby it is a necessity that the Dispatcher is not only familiar with the dispatcher program, but also with the PTT application and the technology behind it.

¶ First Time Installation
To get started, install the dispatcher program for your device. This program is the main tool for dispatchers only; field users and domain admins are using different programs or applications. WT will provide all necessary details and installation steps to the dispatcher or project manager. The program is currently compatible with Windows 7, 8.1 and 10 (64 bit machine).
¶ Before getting started:
- Download Dispatcher Standard zip file
- Be provided with your individual username and password
- Be provided with the domain of your field users
¶ How to install the application:
After successful download, unzip it into a directory and open the application by double-clicking on the Dispatcher.exe application from the folder location of your selection. Alternatively type ‘Dispatcher.exe’ in the search box of your PC’s file locator. Accept all default settings and permissions requested.

¶ First Time Login
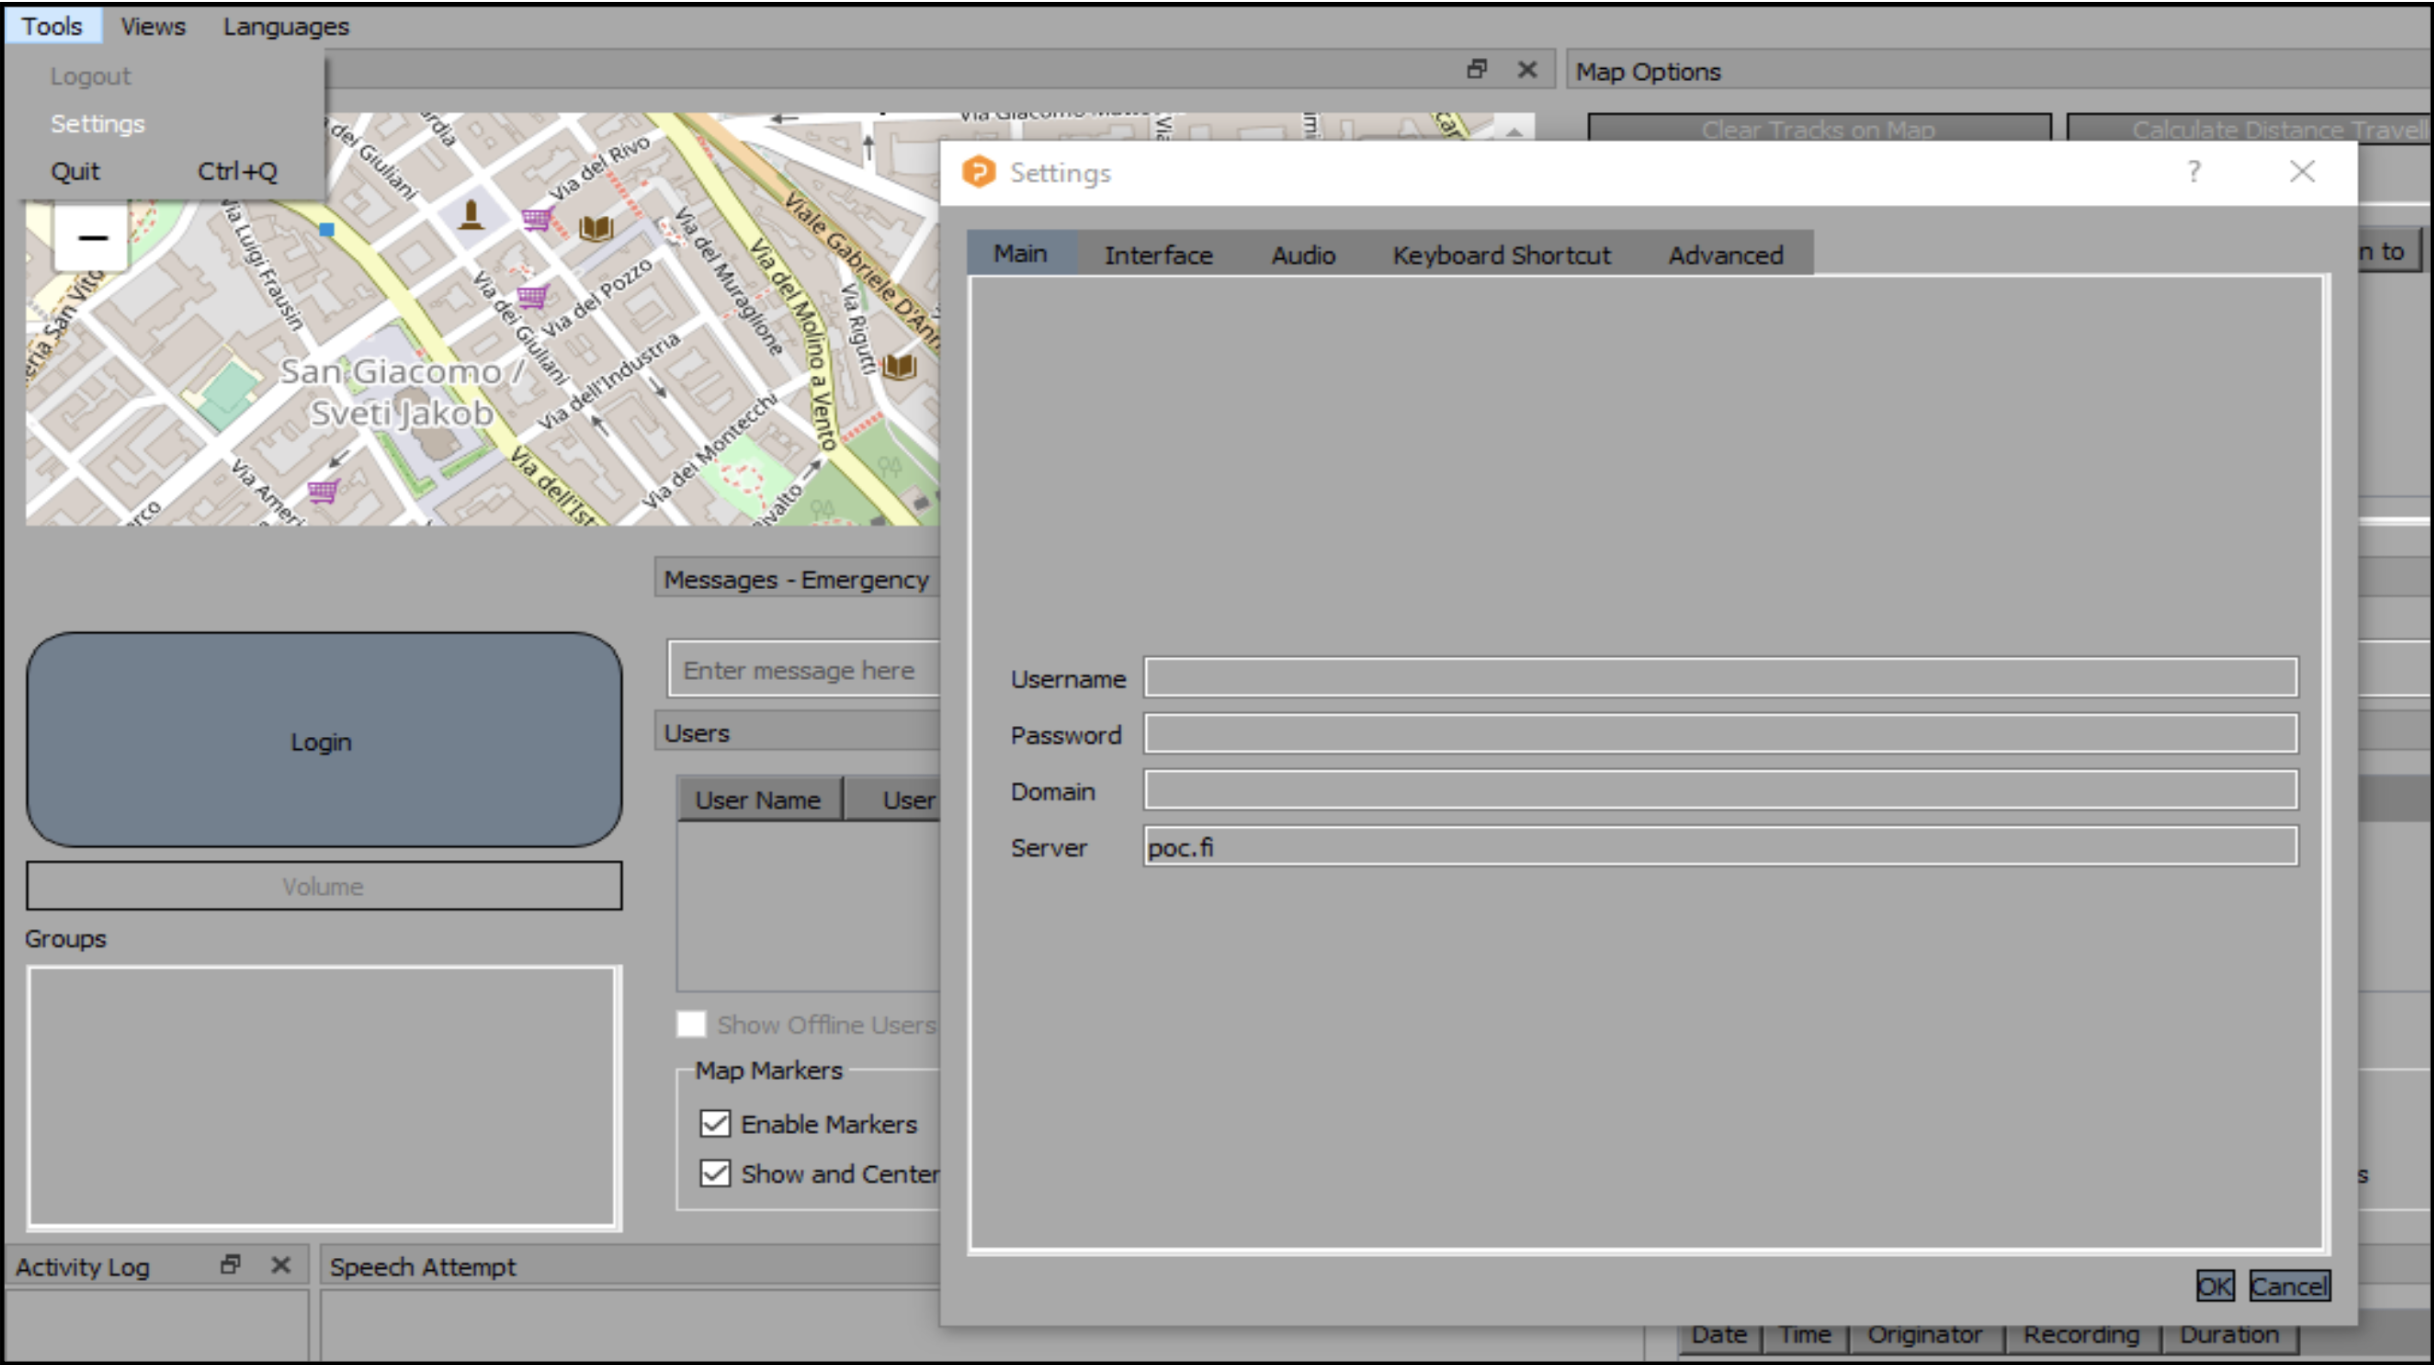
After successful installation, open the dispatcher program from the file location of your selection. First, you may see an empty main page. Click on the ‘Login’ button, insert your username, password, and domain and click ‘OK’. You will see the status on the bottom left corner changing from ‘Logged out’ to ‘Logged in’.

Soon after logging in, all users in the domain will appear in the user list. Bear in mind that only user accounts with dispatcher rights will be able to login to the program. Domain administrator can manage these rights via poc.fi by ticking or unticking the ‘Dispatcher’ box from user settings.

¶ You may always re-login with another account by following the path below:
Tools > Logout
Tools > Settings > Main > (insert username, password & domain) > OK > Login
¶ Dispatcher Home Page
¶ Adding Features
Once logged in, you may edit the main view by clicking on the ‘Views’ menu on the top left corner. All available features, including Messages, User information, Speech attempt board, Activity log, Map, Board, Map options and Replay, can be added into the main view by clicking on them one by one. Selected features will appear on the main view immediately. Remove a feature by clicking again on it from the dropdown list, or alternatively click ‘X’ on the top right corner of the field.
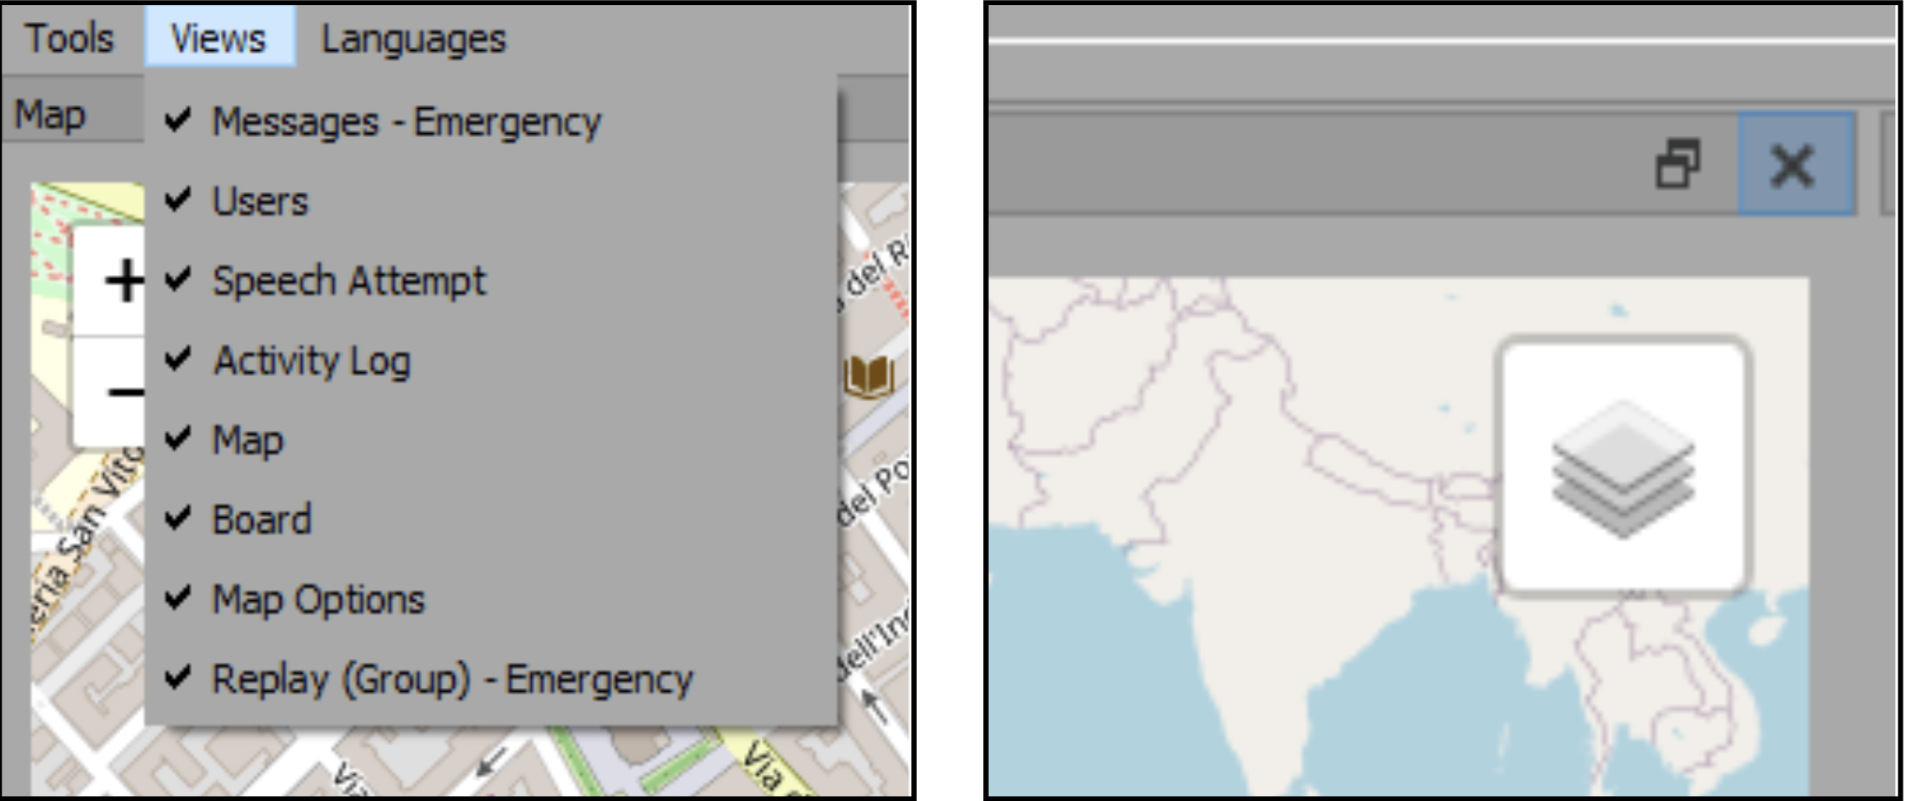
You can personalize the main view by adding and removing specific features, adjusting their sizes, and changing the display positions. Personalization enables the program to support the needs of each project as efficiently as possible by not displaying unnecessary information. In case there are more than one dispatcher in a domain, the responsibilities can be easily divided by modifying the main view. Upon every restart, the home view will automatically display the previously set features.
¶ Languages
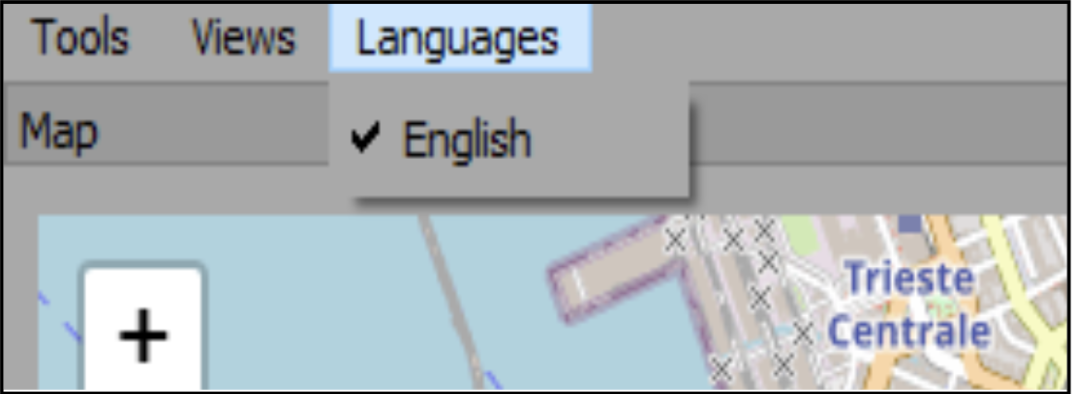
Change the program language from available options. Open the dropdown selection and click on the desired language; the program will update the selection and restart immediately.
¶ Menus & Explanations
After a successful login and adding the features, the program is ready to be used. The default look might vary between different screens and devices. Each dispatcher can manage and adjust the features, field size, and their position according to preferences, so your home view might look different from the example below.
See the menus and explanations below to navigate the program successfully.
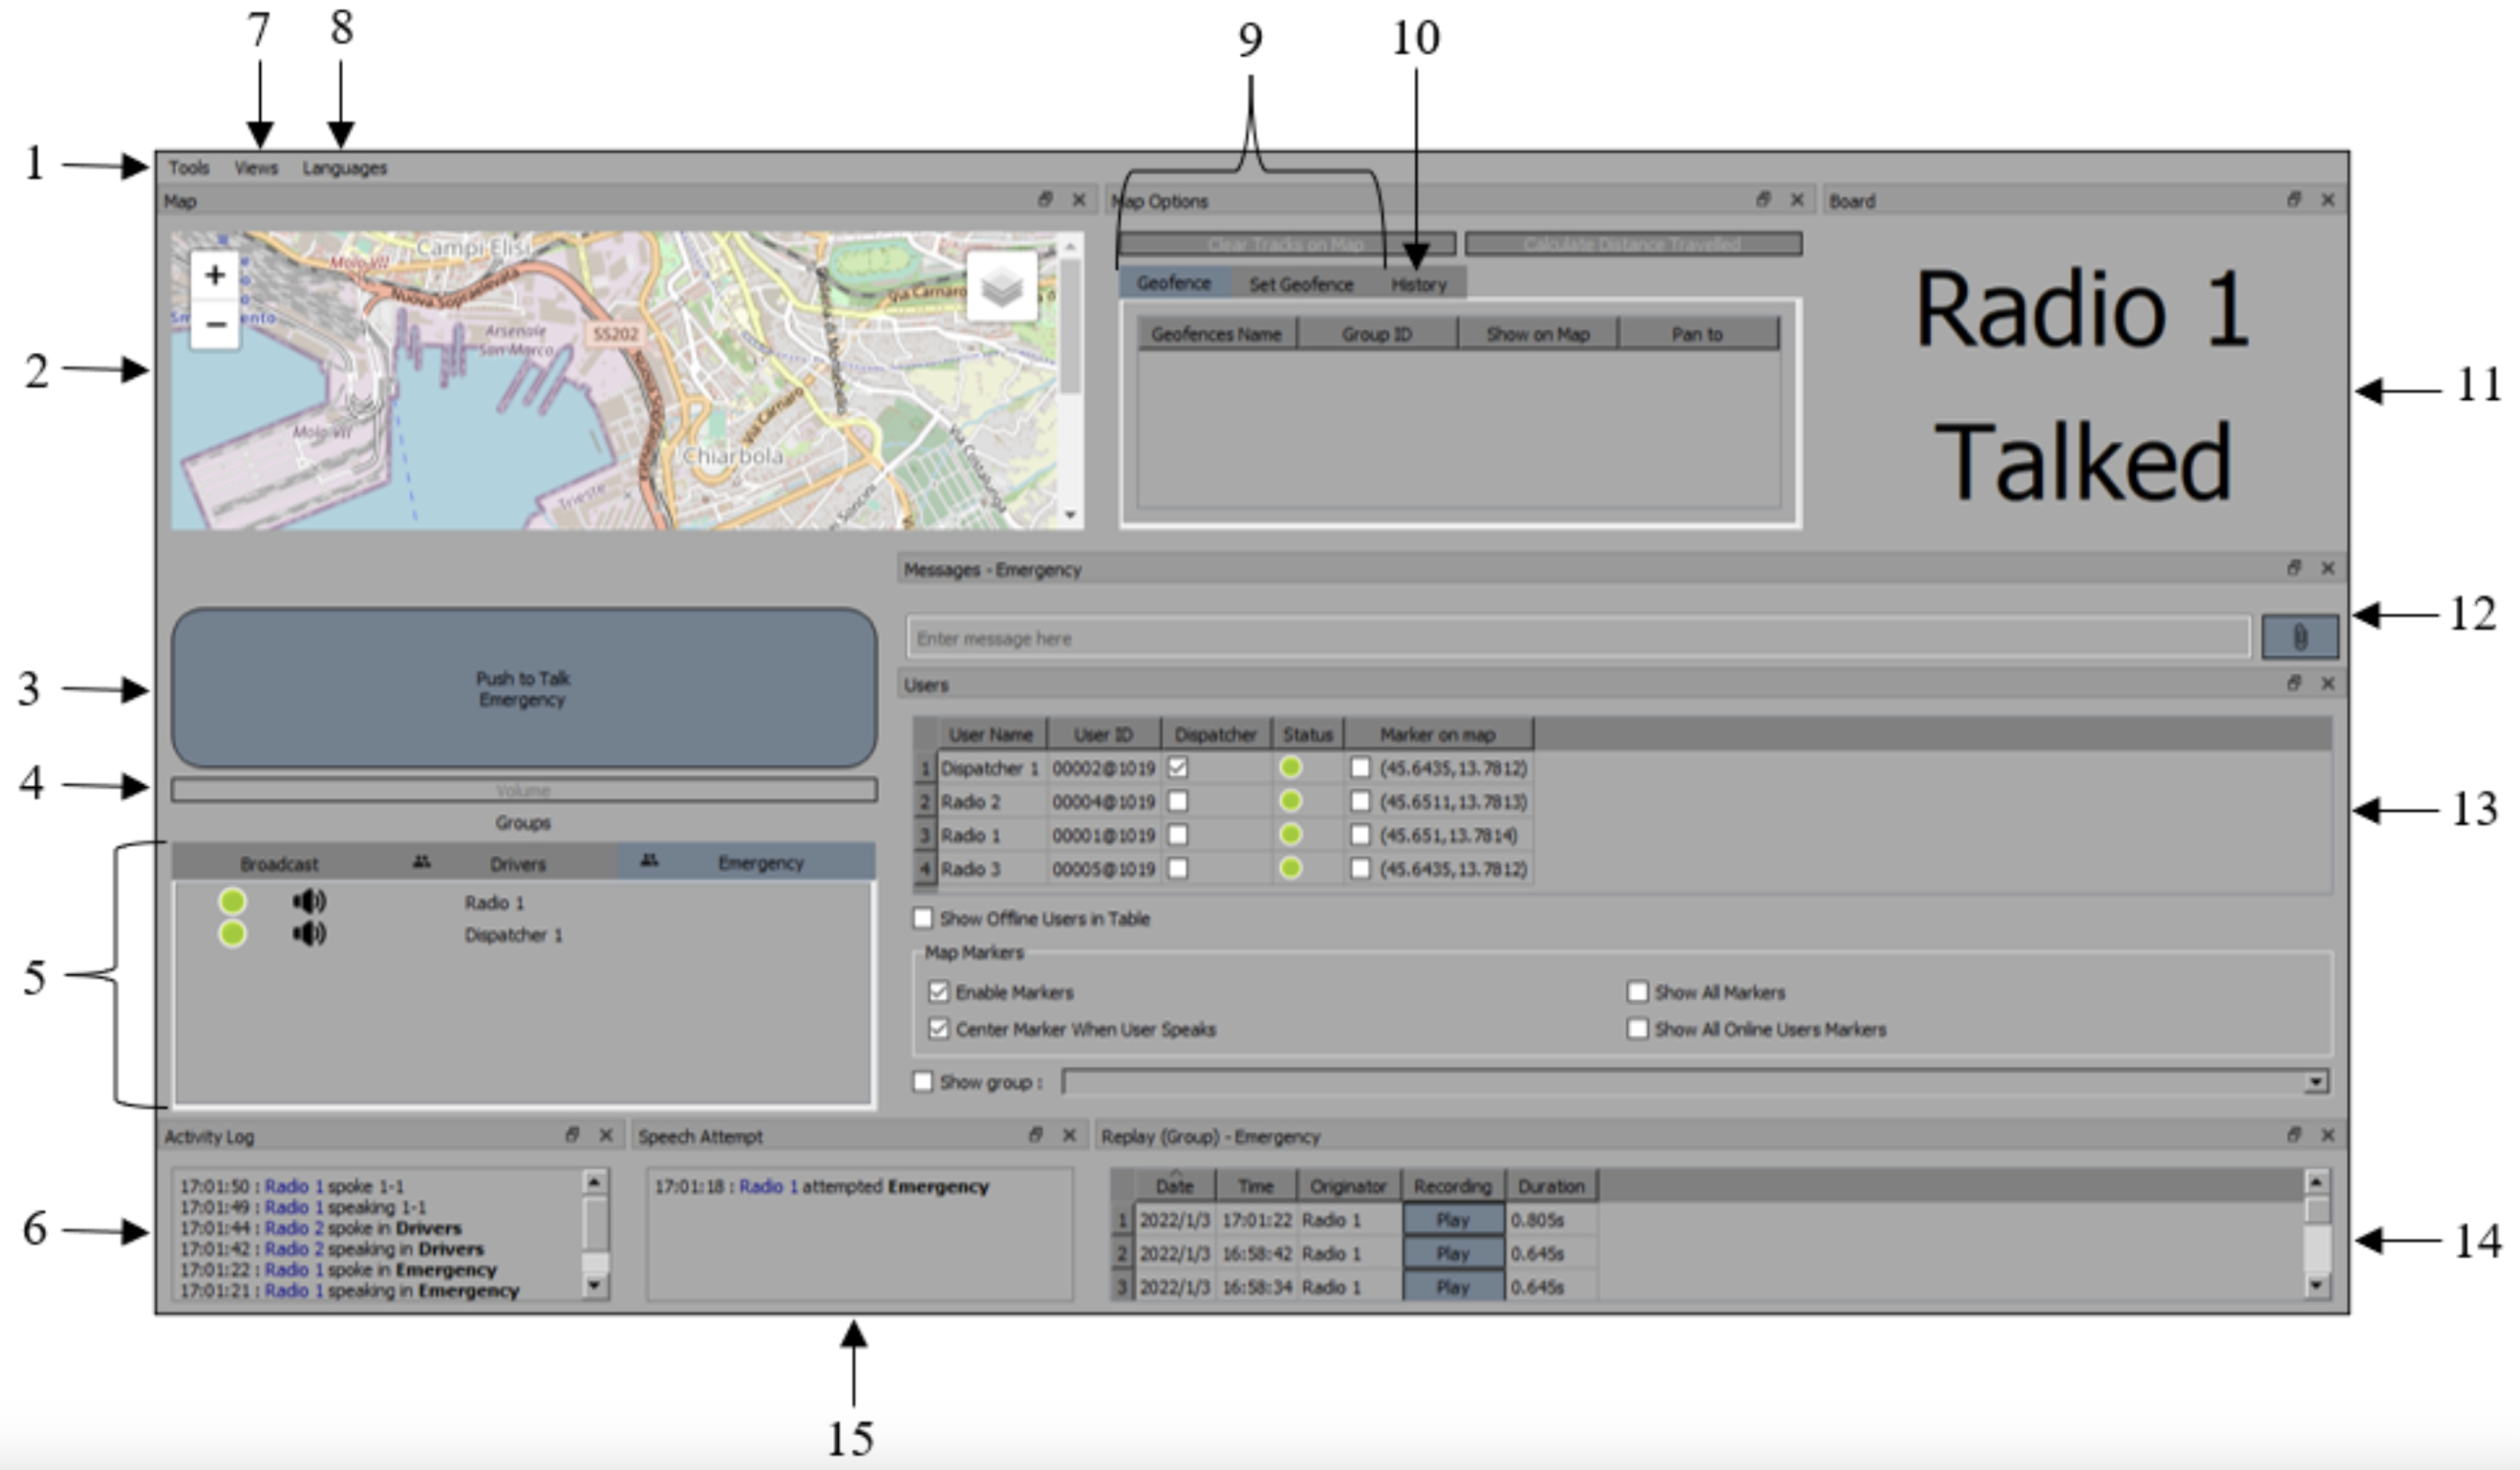
| 1. | Tools menu | 9. | Geofence |
| 2. | Map | 10. | Location history |
| 3. | PTT/login button | 11. | Activity board |
| 4. | Volume bar | 12. | Messages |
| 5. | Group selection & member list | 13. | User list |
| 6. | Activity log | 14. | Replay |
| 7. | Edit home view | 15. | Speech attempt board |
| 8. | Languages |
¶ Features - Talk
¶ Group Call
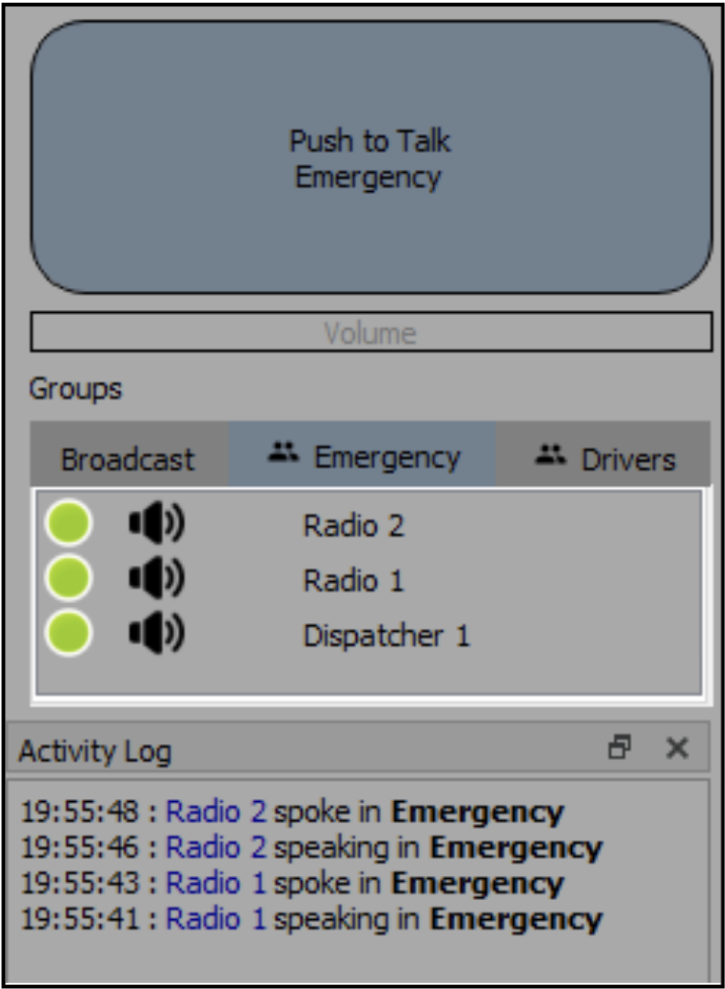
Select a group from the group selection. Press and hold on ‘Push to Talk (name of the selected group)’ button and release to send. The call volume level is indicated on the bar below the PTT button. All active users, indicated by green dots, will hear the Dispatcher’s audio message in real time.
After finishing the call, the activity log will automatically refresh displaying the latest activity. The activity log, located under the group member list, indicates call time, speaker, and group name, most recent call on the top. Please note, that only group calls and one-to-one calls between the Dispatcher and a user are listed here. You may always access and listen again to the group calls and private one-to-one calls, also those that do not include the Dispatcher, by accessing the replay field.


¶ One-to-One Call
Select one-to-one mode by right clicking the selected user on the user list or group member list and choosing ‘1-1 Mode’. Alternatively, double-click on a selected user from the group member list. One-to-one mode will activate the private call, messaging, and user specific replay fields. Press and hold the ‘Push to Talk 1-1: (name of the selected user)’ button to talk to a user and release to send.
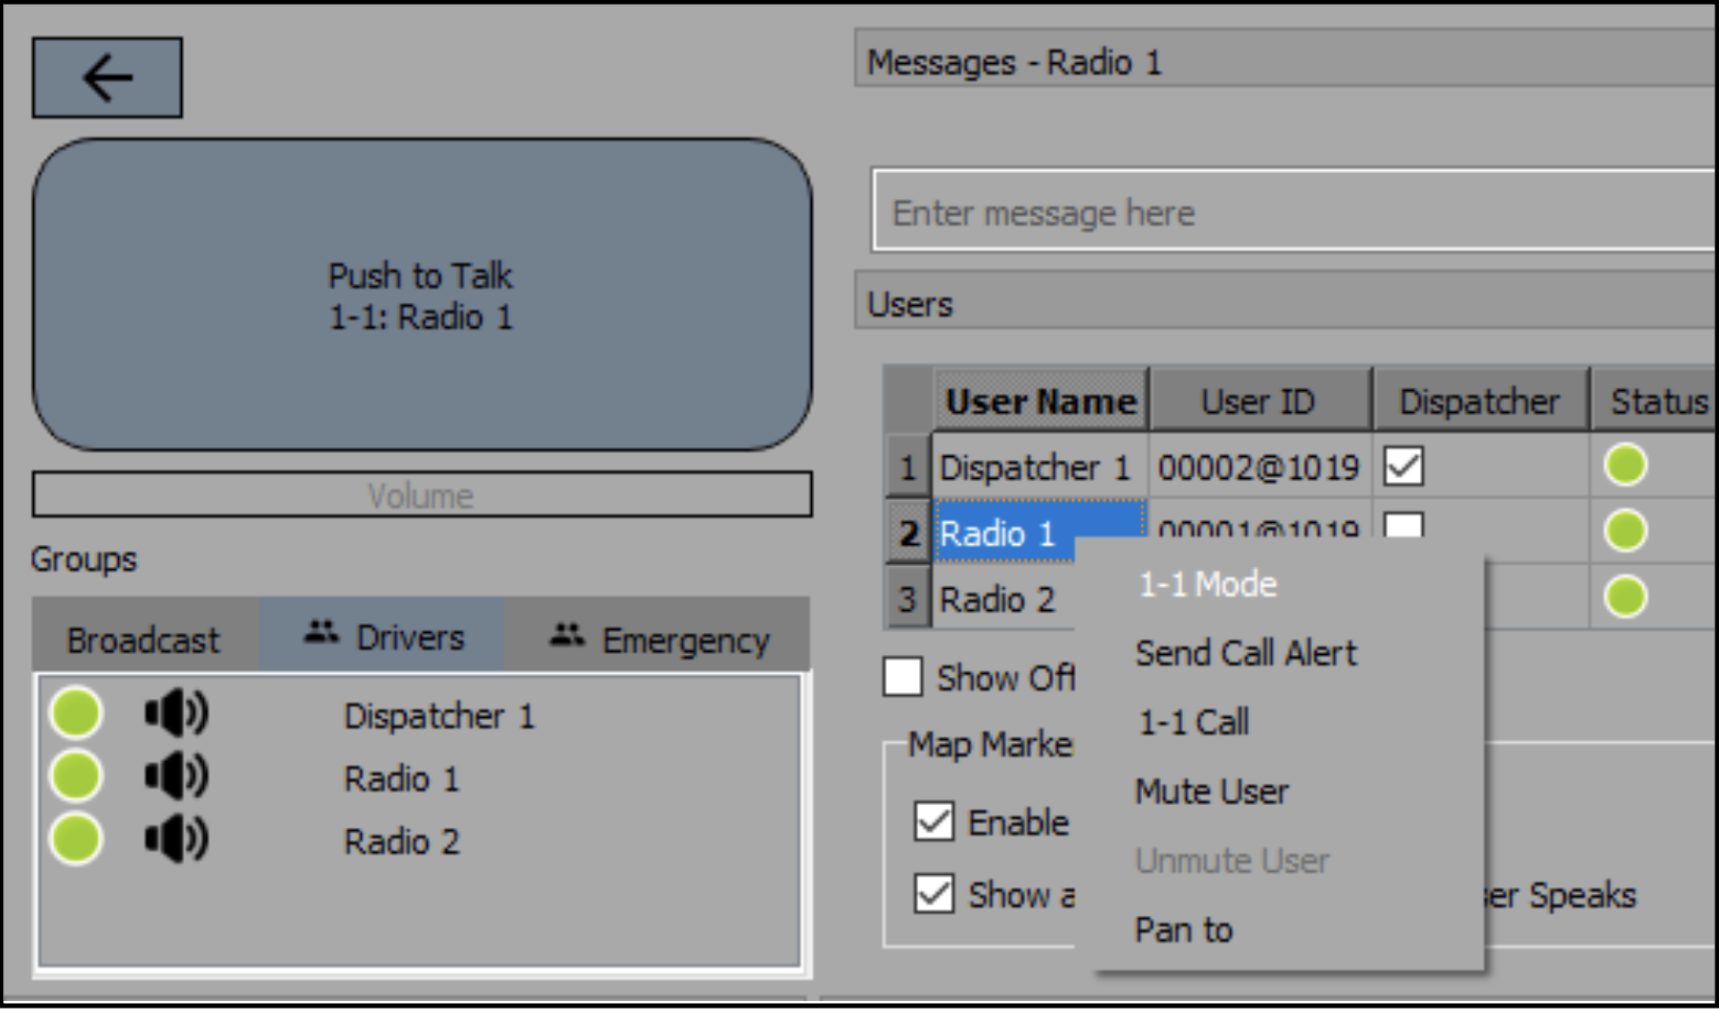
You may also request a continuous call by choosing 1-1 Call without a need to press and hold to talk. Right click on a selected user from the user list or group member list to open the drop-down selection and click on ‘1-1 Call’. The recipient must answer the Dispatcher's call request, like during a normal GSM voice call, before being able to talk to each other. Likewise, the call must be hung up by clicking ‘End Call’. Exit One-to-One mode by clicking on the back arrow on top of the PTT button or by clicking on any group from the group name from the group selection.

You can also make or respond to a private call without entering one-to-one mode. This is a fast way of communicating with individual users, but only possible if the markers on the map are enabled. Press and hold on the microphone logo and release to send.

¶ Broadcast
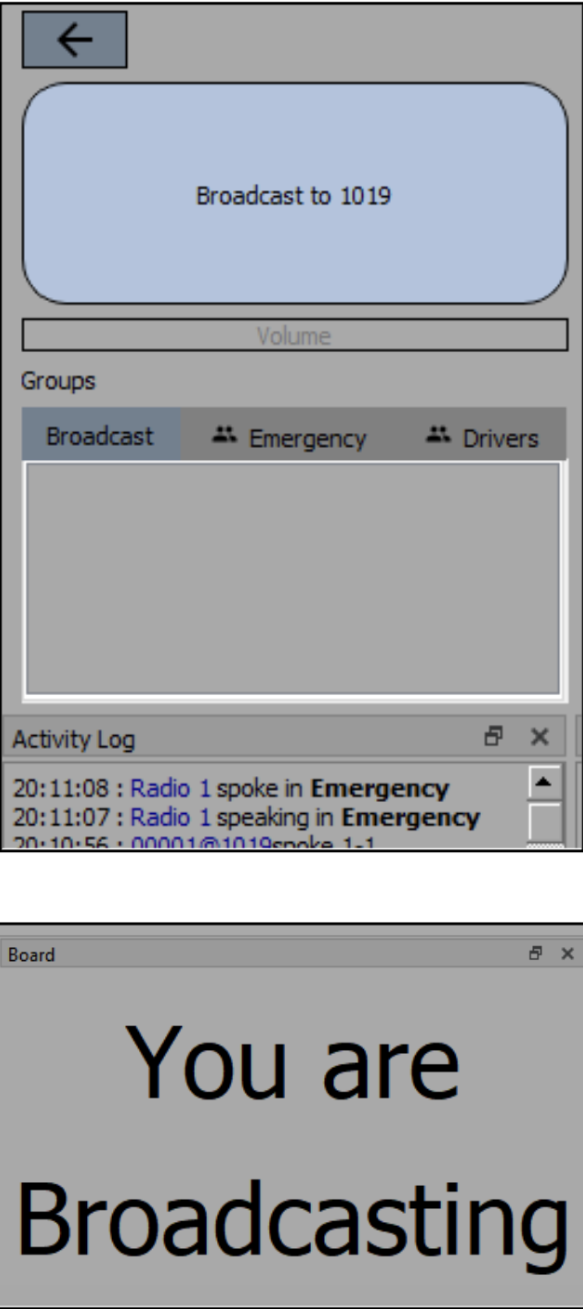
In addition to normal group and one-to-one calls the Dispatcher has an option for immediate broadcasting. This feature will force-open the line to all online users in the domain (including users with status ‘Do not Disturb’) and convey the Dispatcher's message to them. The broadcasting feature can be especially useful in case of an emergency or other urgent reason.
To activate broadcasting, click on ‘Broadcast’ from the group selection. The PTT button will indicate the domain address and function as a broadcast button. Press and hold on the PTT button to activate the line and start talking. The activity board will update immediately indicating the broadcasting mode, and all active users will hear your voice in real time. Release to stop and return to normal view by clicking on the back arrow or any group from the group selection.
¶ Message
¶ Group messaging:
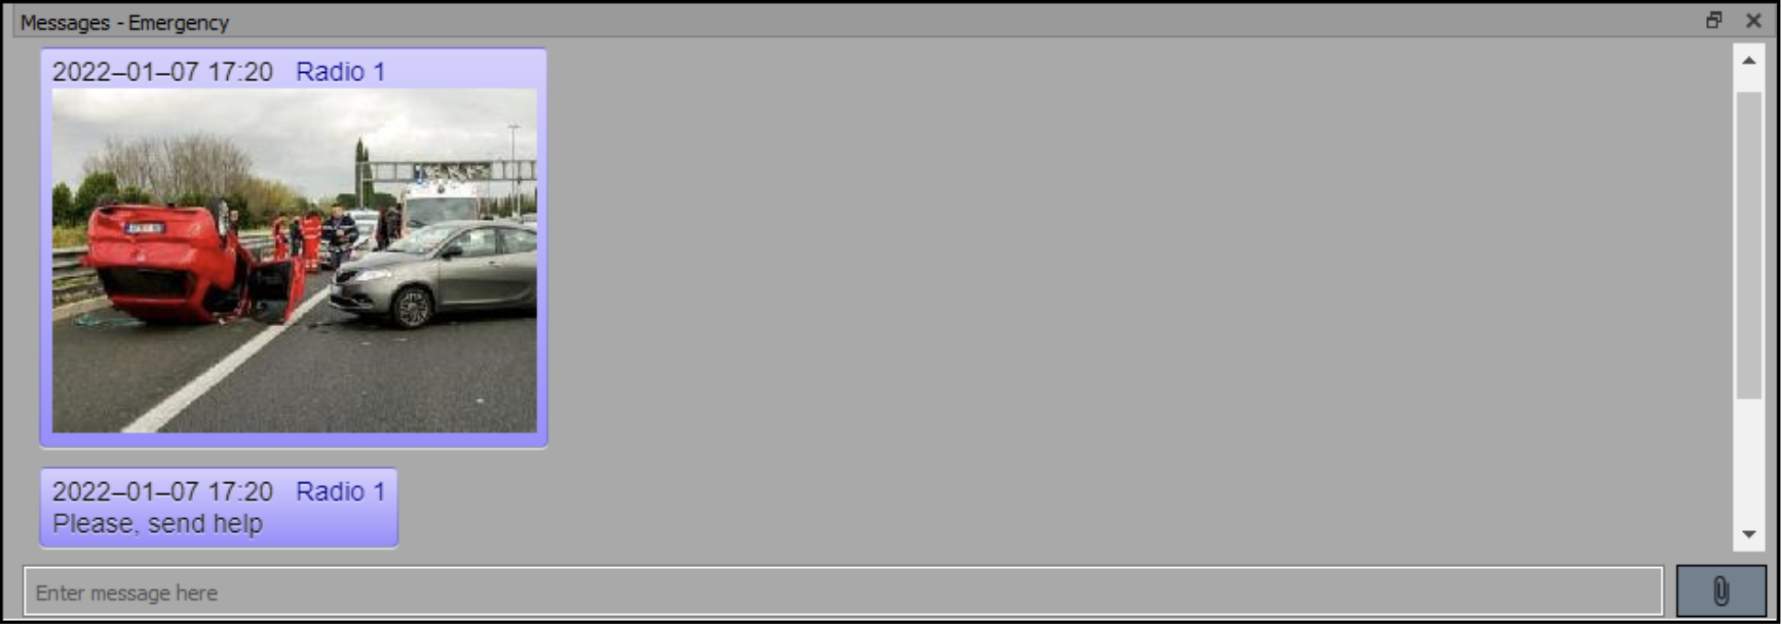
Selected group is indicated on top of the message field, and can be changed from the group selection at any time. Type in the message and click ‘Enter’ to send. Click on the ‘attach files’ symbol on the right hand side to insert multimedia content from your device. Click on a received photo or multimedia content to open it in a new window in order to download it on your computer. New messages and multimedia files will appear into the messages field in real time. The sender details are visible on top of each message including the sending date, time, and user name.
¶ One-to-One messaging:
Right click on a specific user and select ‘1-1 Mode’ from the drop-down selection. The previously active messaging field will be replaced by a one-to-one messaging field according to the selection (user indicated on top of the message field). Type and send a private message by clicking ‘Enter’.

¶ Message notifications:
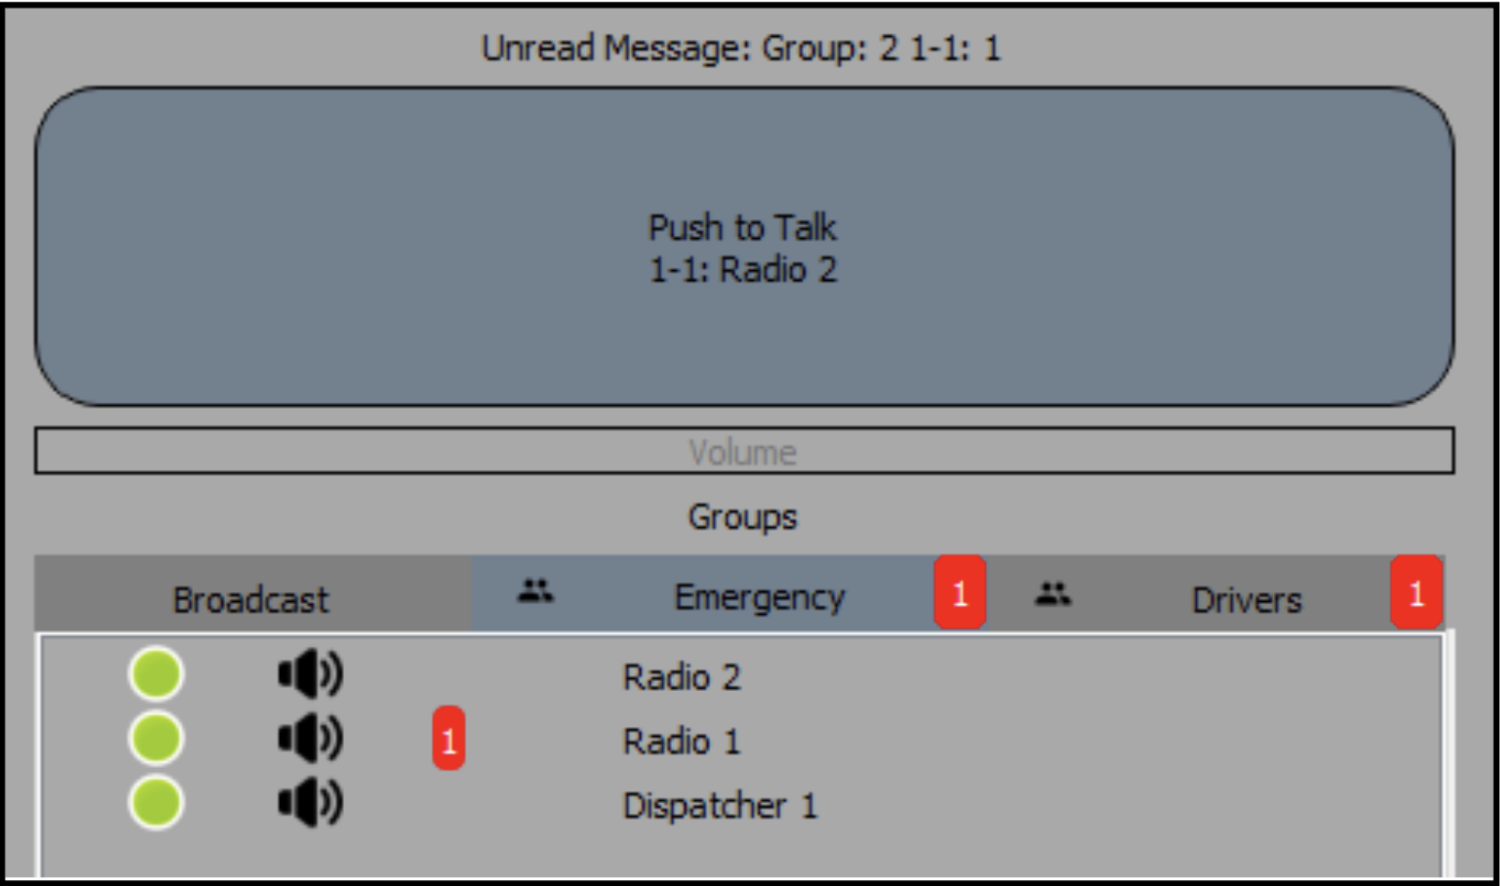
The number of unread messages will be displayed on top of the PTT button. In addition, a red marker next to the group name or private user will indicate the originator and number of messages. The notification marker will automatically disappear when the specific message field is being opened.
¶ Users
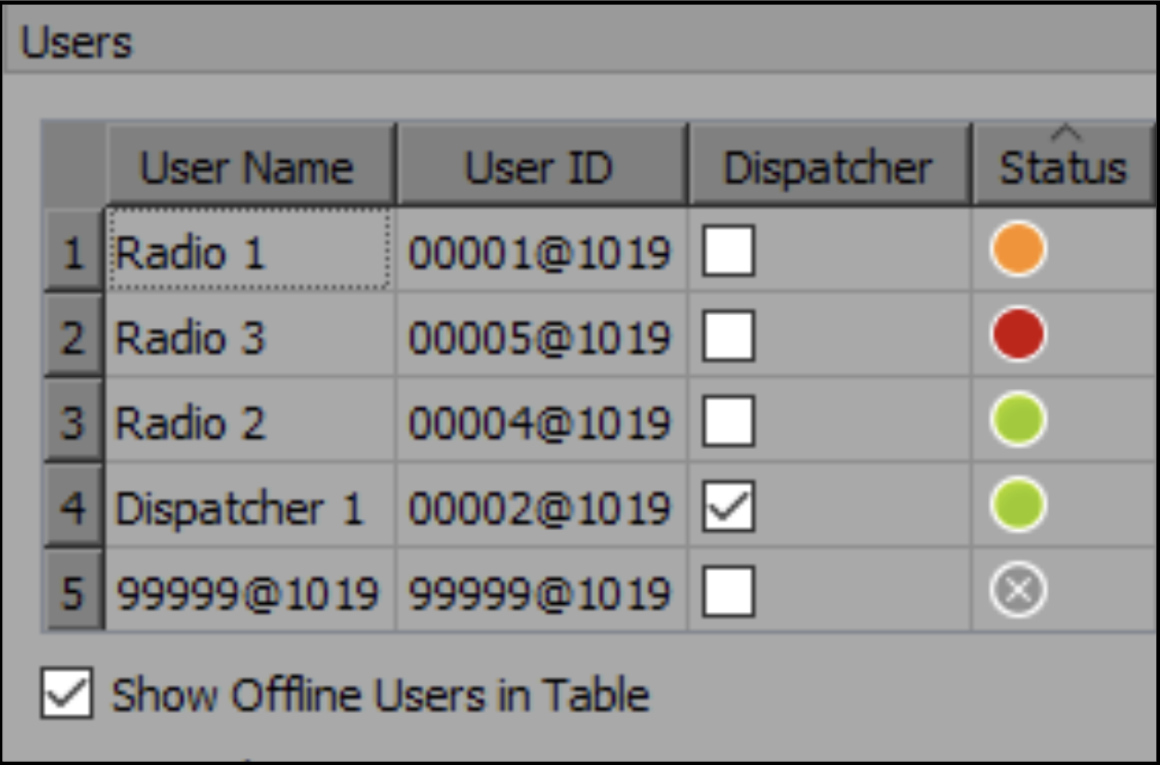
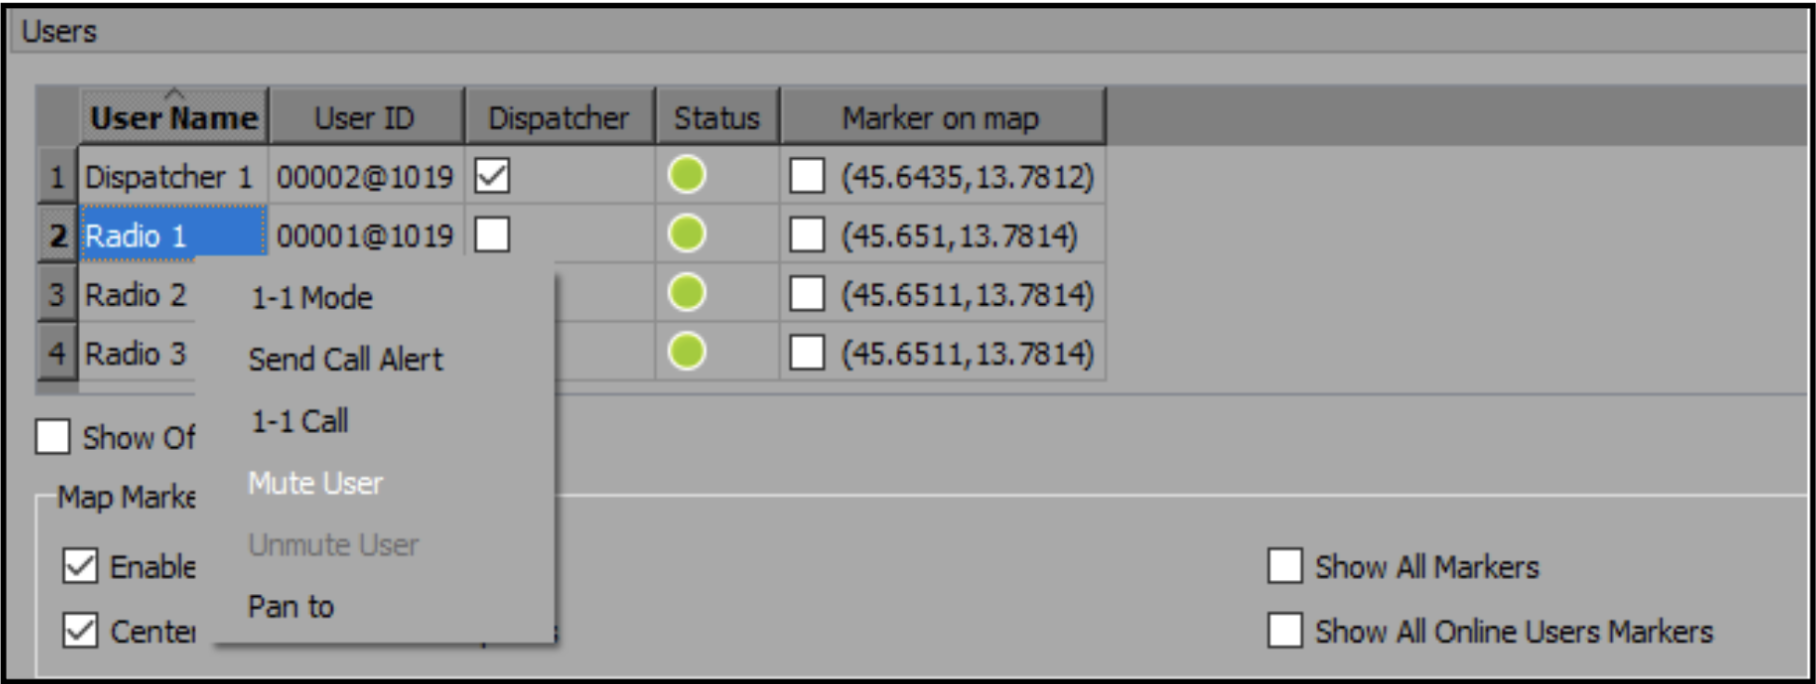
All necessary information about the users in the domain can be found on the user list field. The first column indicates the User Name (nickname) followed by User ID, Dispatcher indicator managed by the Domain Admin, Status, and Marker on map tick boxes (with coordinates). You may reorganize the user list by clicking on the column titles. Arrow up indicates ascending/alphabetical order and arrow down descending/reverse-alphabetical sort order.

Tick the box ‘Show Offline Users in Table’ to display all domain users on the list. Tick the box ‘Show All Markers’ to show the locations of all users on the map. You may also tick the boxes of selected users one by one from the column ‘Marker on map’. Tick the box ‘Show All Online Users Markers’ to show the locations of currently active users. If the ‘Show All Markers’ was already ticked, and you hide the online users by re-clicking the box, only offline users will be seen on the map. Unticking the ‘Show All Markers’ will hide all the markers on the map. Tick the box ‘Center Marker When User Speaks’ to automatically expose the current speaker on the map. Either the ‘Marker on map’ or ‘Show All Markers’ box must have been ticked for this feature to function. Tick the box ‘Show group’ and select a group from the dropdown list to display the members of the selected group only on the user list field.
¶ Status:
The current status of the users are indicated on the third column by different colors. The colors are consistent with the PTT application and update to dispatcher in real time according to the field user's actions. See the color explanations below:
- Green: Available
- Orange: Do not disturb (user will not receive 1-1 calls or notification sounds)
- Red: Unavailable (user does not wish to be reached; receives the calls as always)
- Gray: Offline (user is not available; calls, messages and alerts will not deliver)
¶ Call Alert
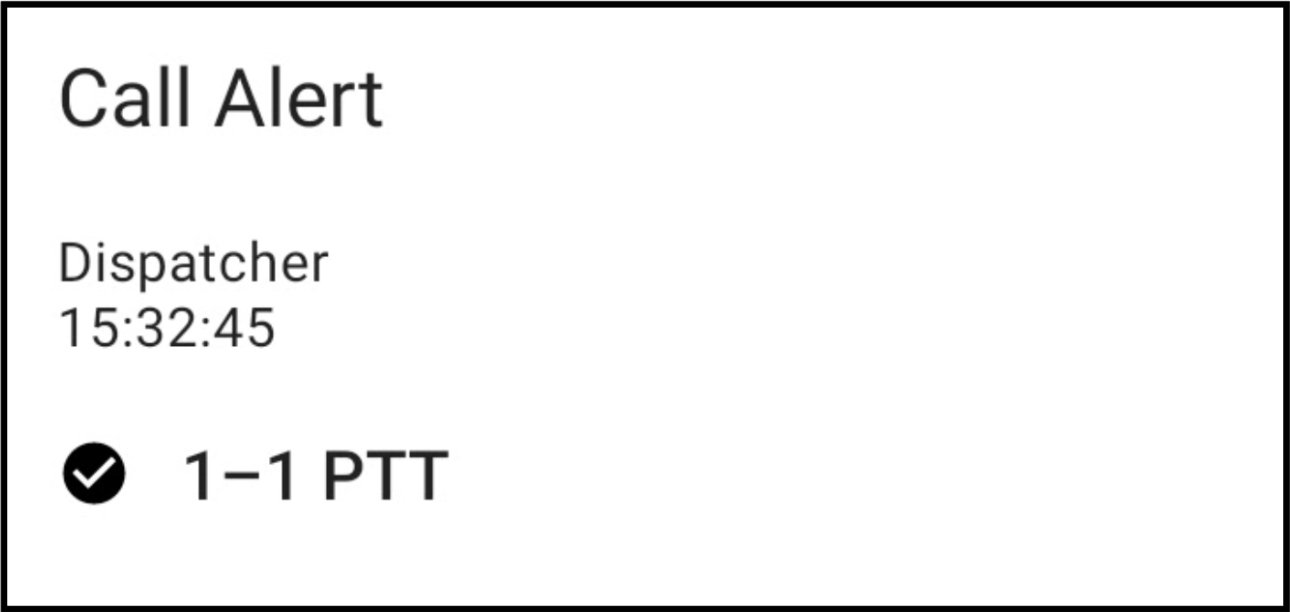
You can send out a call alert, an instant voice signal, to a specific user. The same feature is available between field users only, and it is especially useful in urgent situations. However, the Dispatcher cannot include a voice message or text, but only sender information and time is displayed on the recipient device. The recipient must be online and available so that a successful call alert can be delivered.

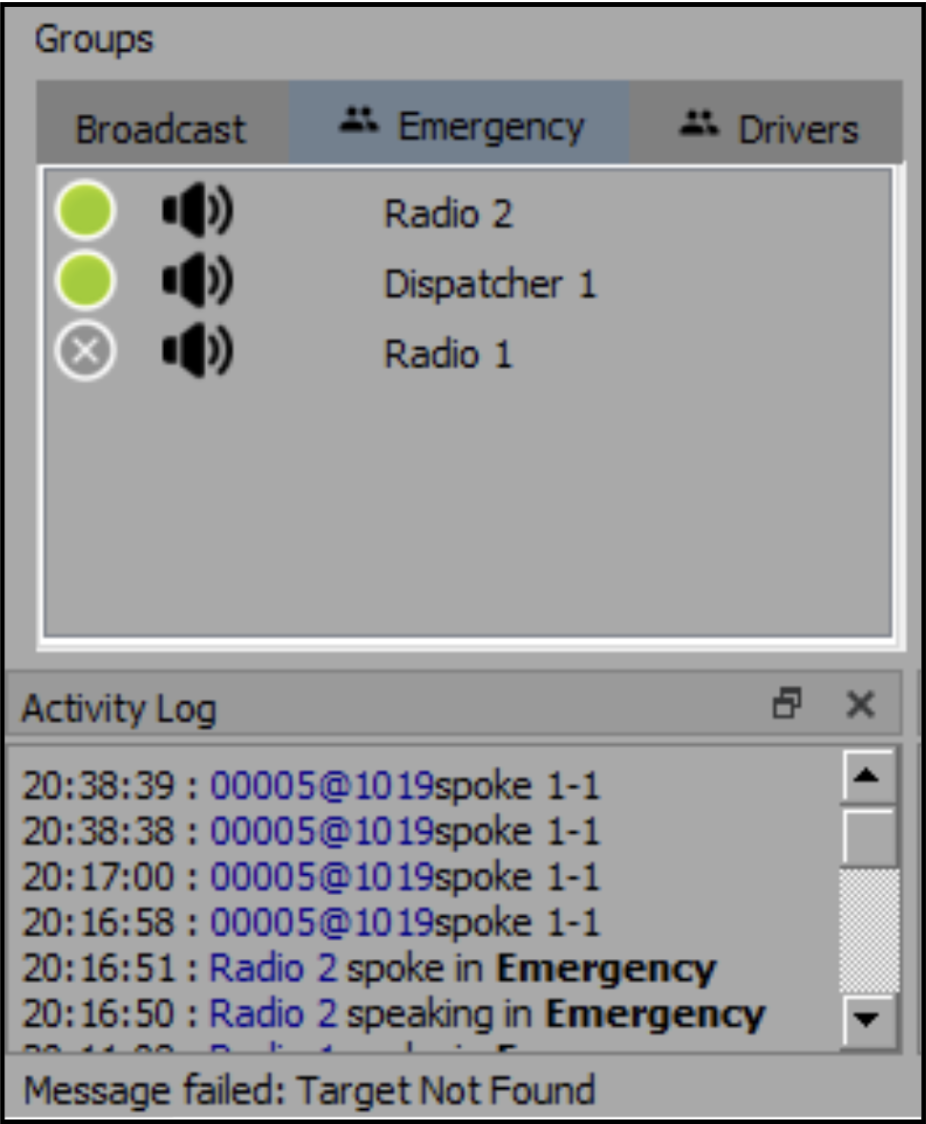
Send an alert by right clicking on a selected user from the user list or group member list and choose ‘Send Call Alert’. The recipient’s device will play a continuous alarm until it is either answered or closed. Answering the call alert will activate 1-1 talk view on the recipient’s device. If the recipient is on ‘Do not Disturb’ mode, a pop-up banner will appear on the device without sound. If the user is offline, the call alert will fail indicated on the bottom left corner.
¶ Map
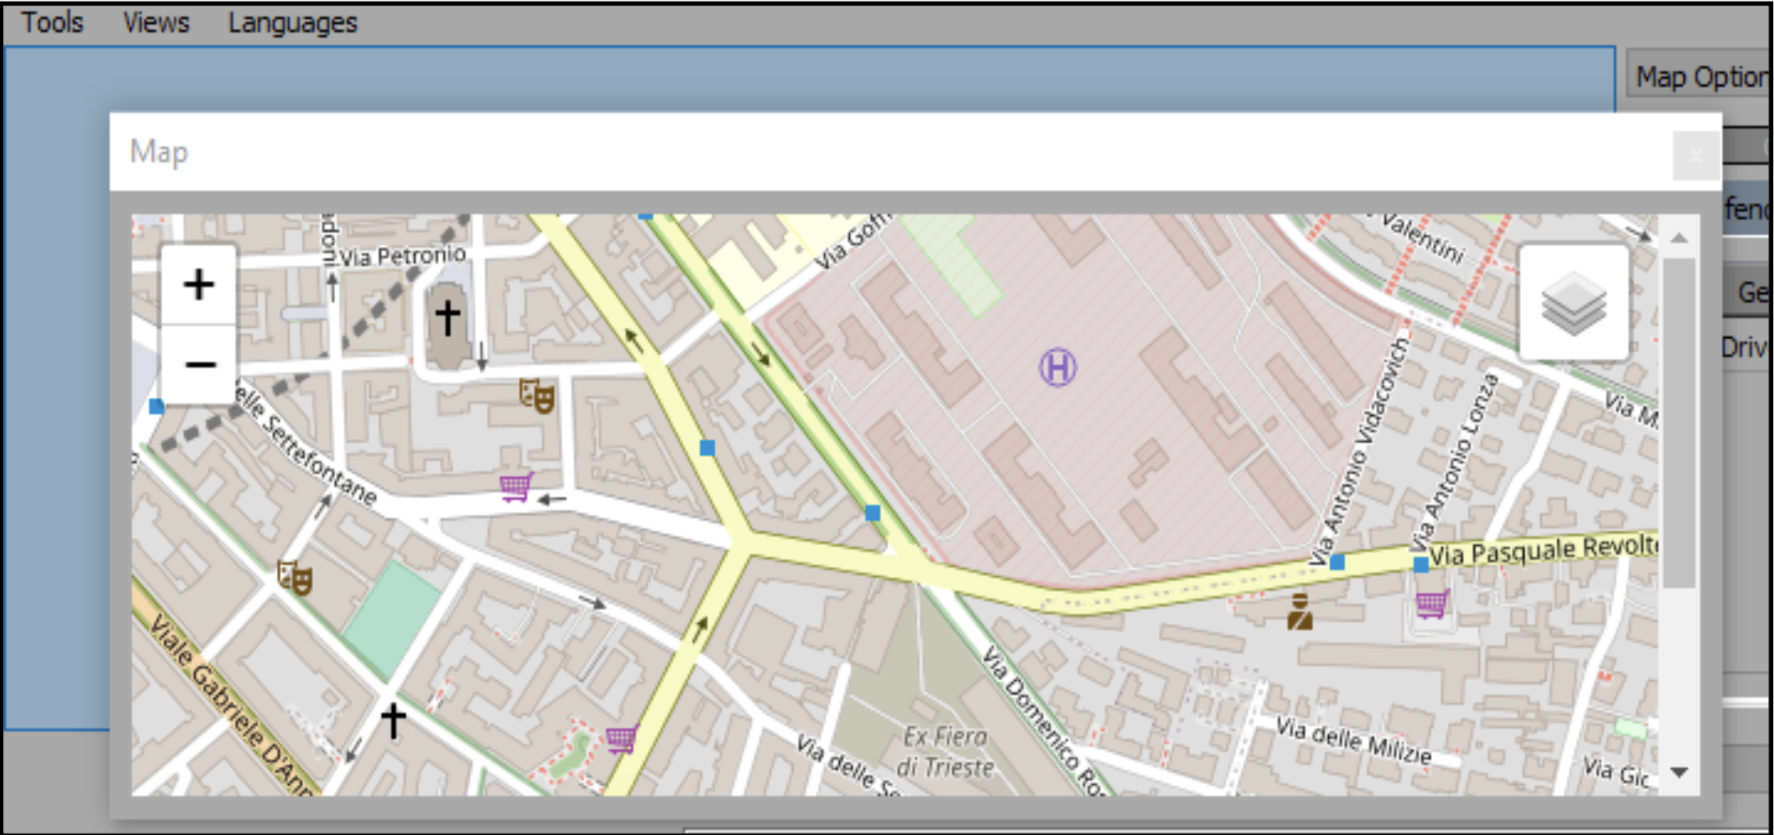
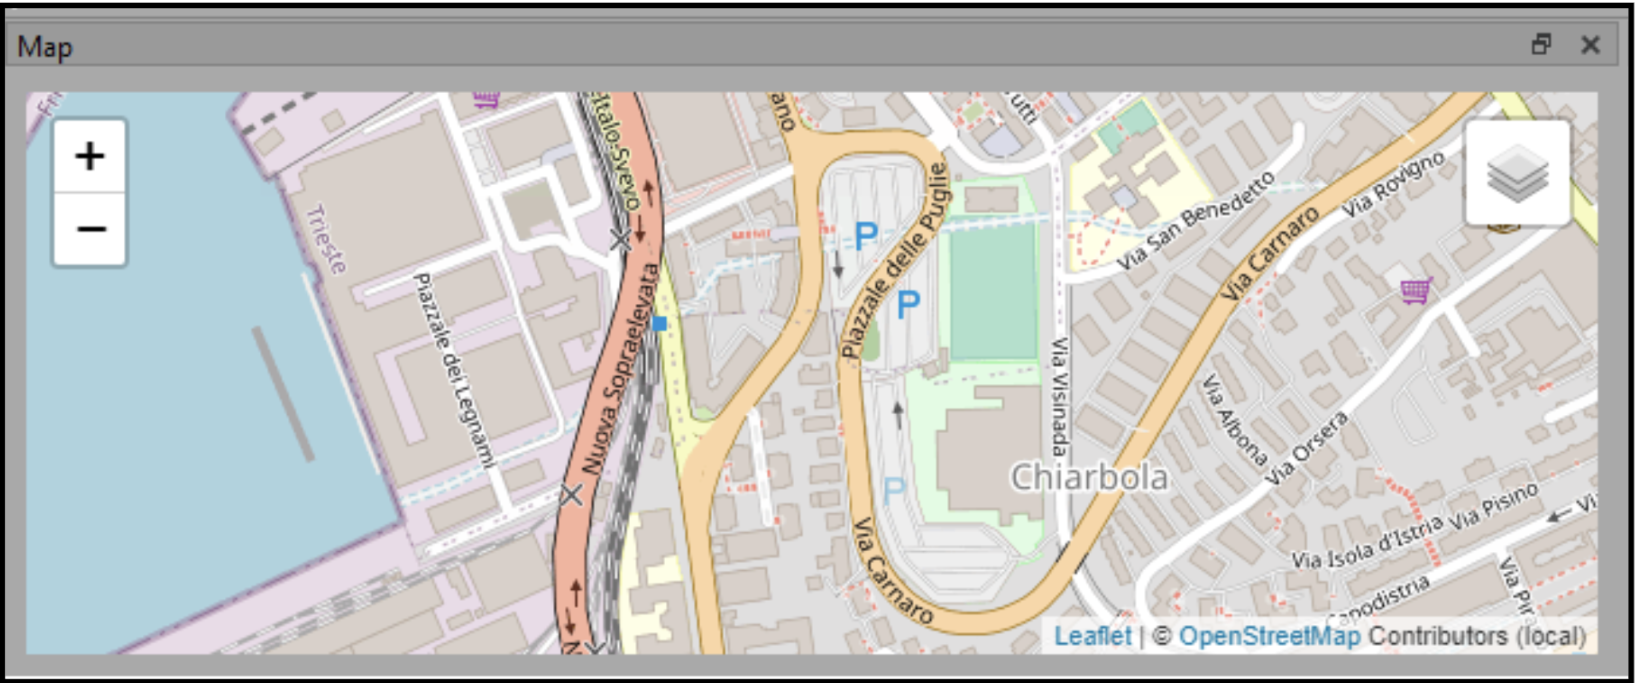
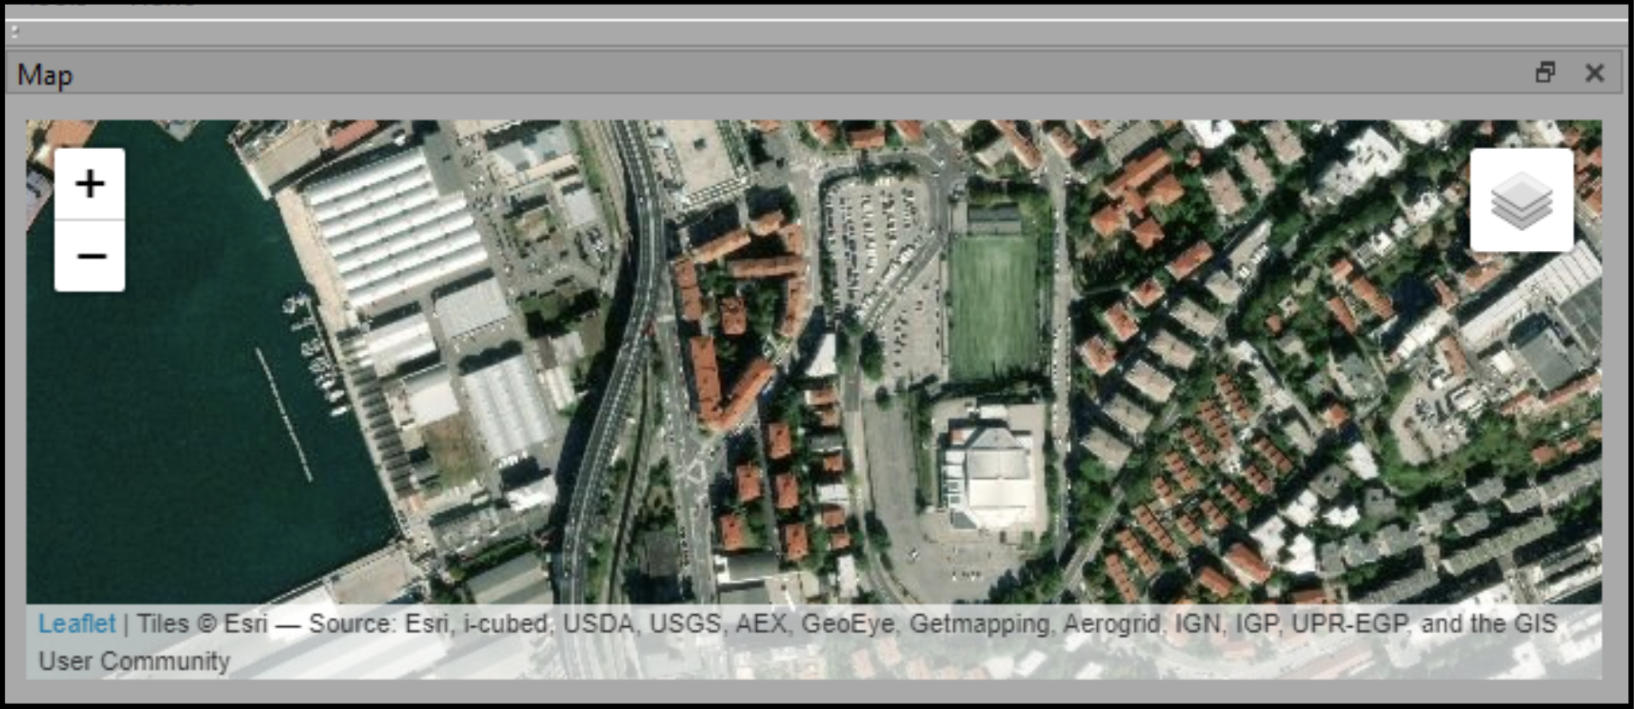
Move the map in different positions by pressing and holding the cursor on it. Adjust the proximity from the zoom in (plus) and zoom out (minus) buttons on the top left corner. You may also zoom in by double-clicking on the map. Change the map style from the menu on the top right corner. Available map styles, OpenStreetMap (default), ESRI and GOOGLESAT are displayed below.
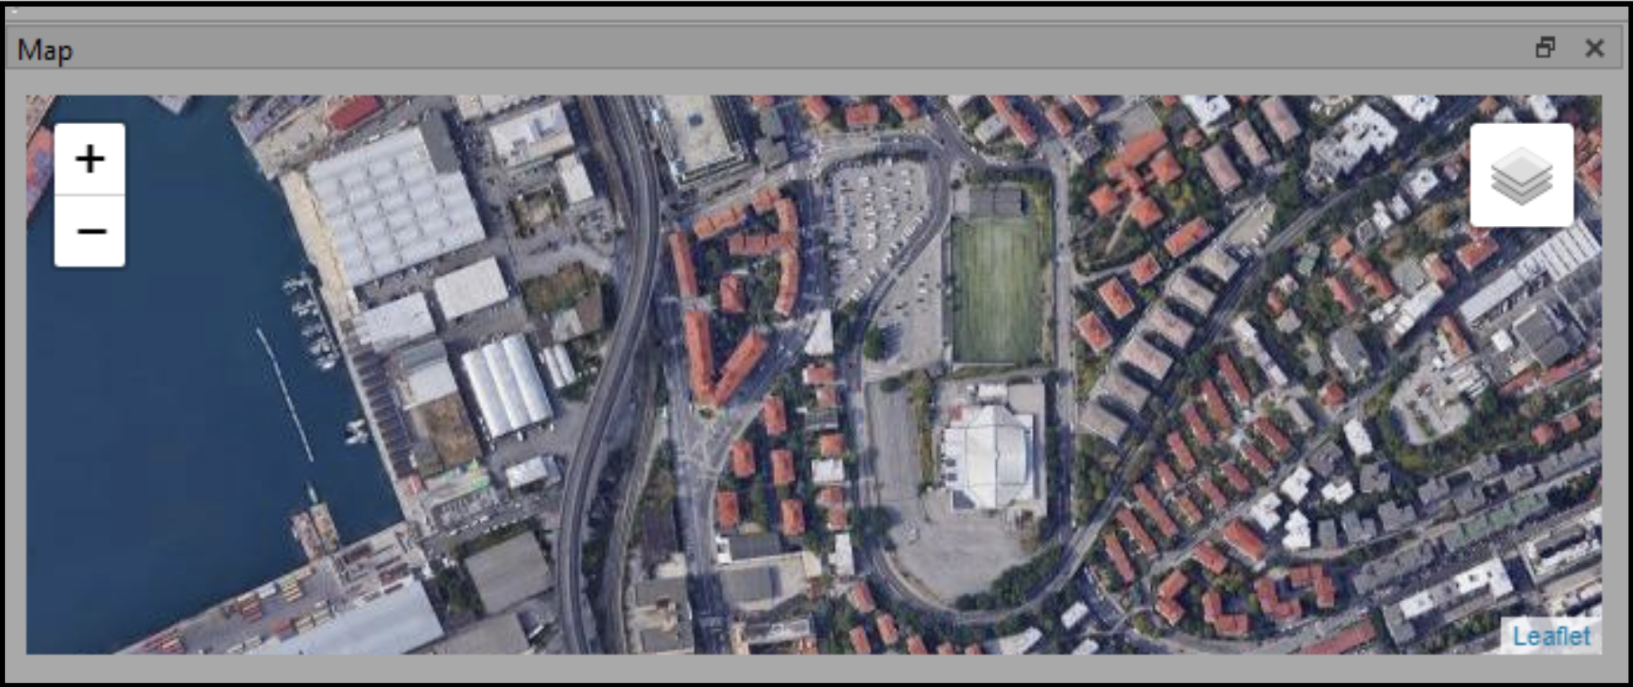
Tick the box ‘Marker in map’ from the user list in order to see the field user’s current location. If the marker is visible and the setting ‘Center Marker When User Speaks’ enabled, the user will be exposed every time he or she speaks.

¶ Map Options
¶ Set Geofence
The Dispatcher can set a geofence, a virtual perimeter for a defined geographic area from the ‘Map options’ field. A group specific geofence defines the borders of movement and controls the functioning area of field users. Activated geofence will always be visible on the field users’ maps.
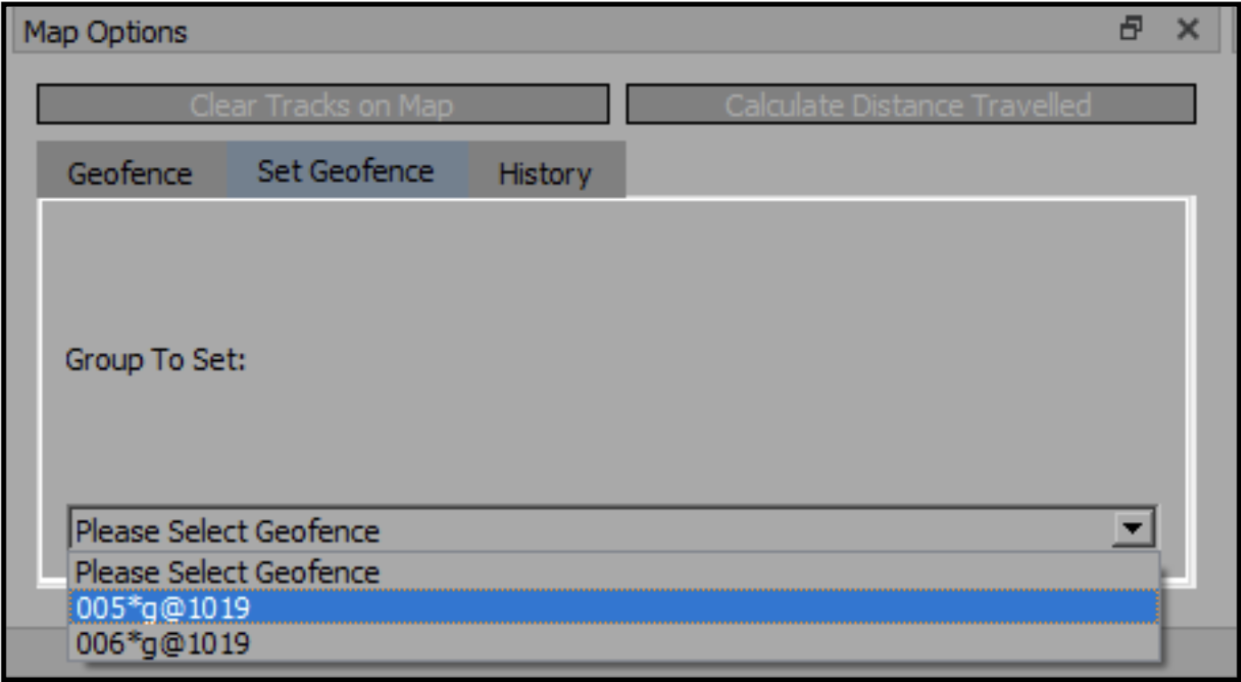
Define new geofence by clicking on ‘Set Geofence’. Choose a group from the drop-down selection (format ‘GroupID*g@domain’). Then click on ‘Draw a circle’ from the map options. Set geofence by placing the cursor on the desired center point of the geofence on the map. Click, hold and drag to define the circle, and release to confirm. This will activate a pop-up window providing a detailed report including the group name, geofence type, latitude, longitude, and radius. Click ‘OK’ to activate, and the geofence will soon appear in the geofence list.

All active geofences will be seen on the Geofence list within a short delay. Tick ‘Show on Map’ to see the geofence area illustrated on the map. Click ‘Pan to’ to expose the selected geofence. If the group member is not located within the geofence area, he or she is automatically unable to join the group.

¶ Edit Geofence
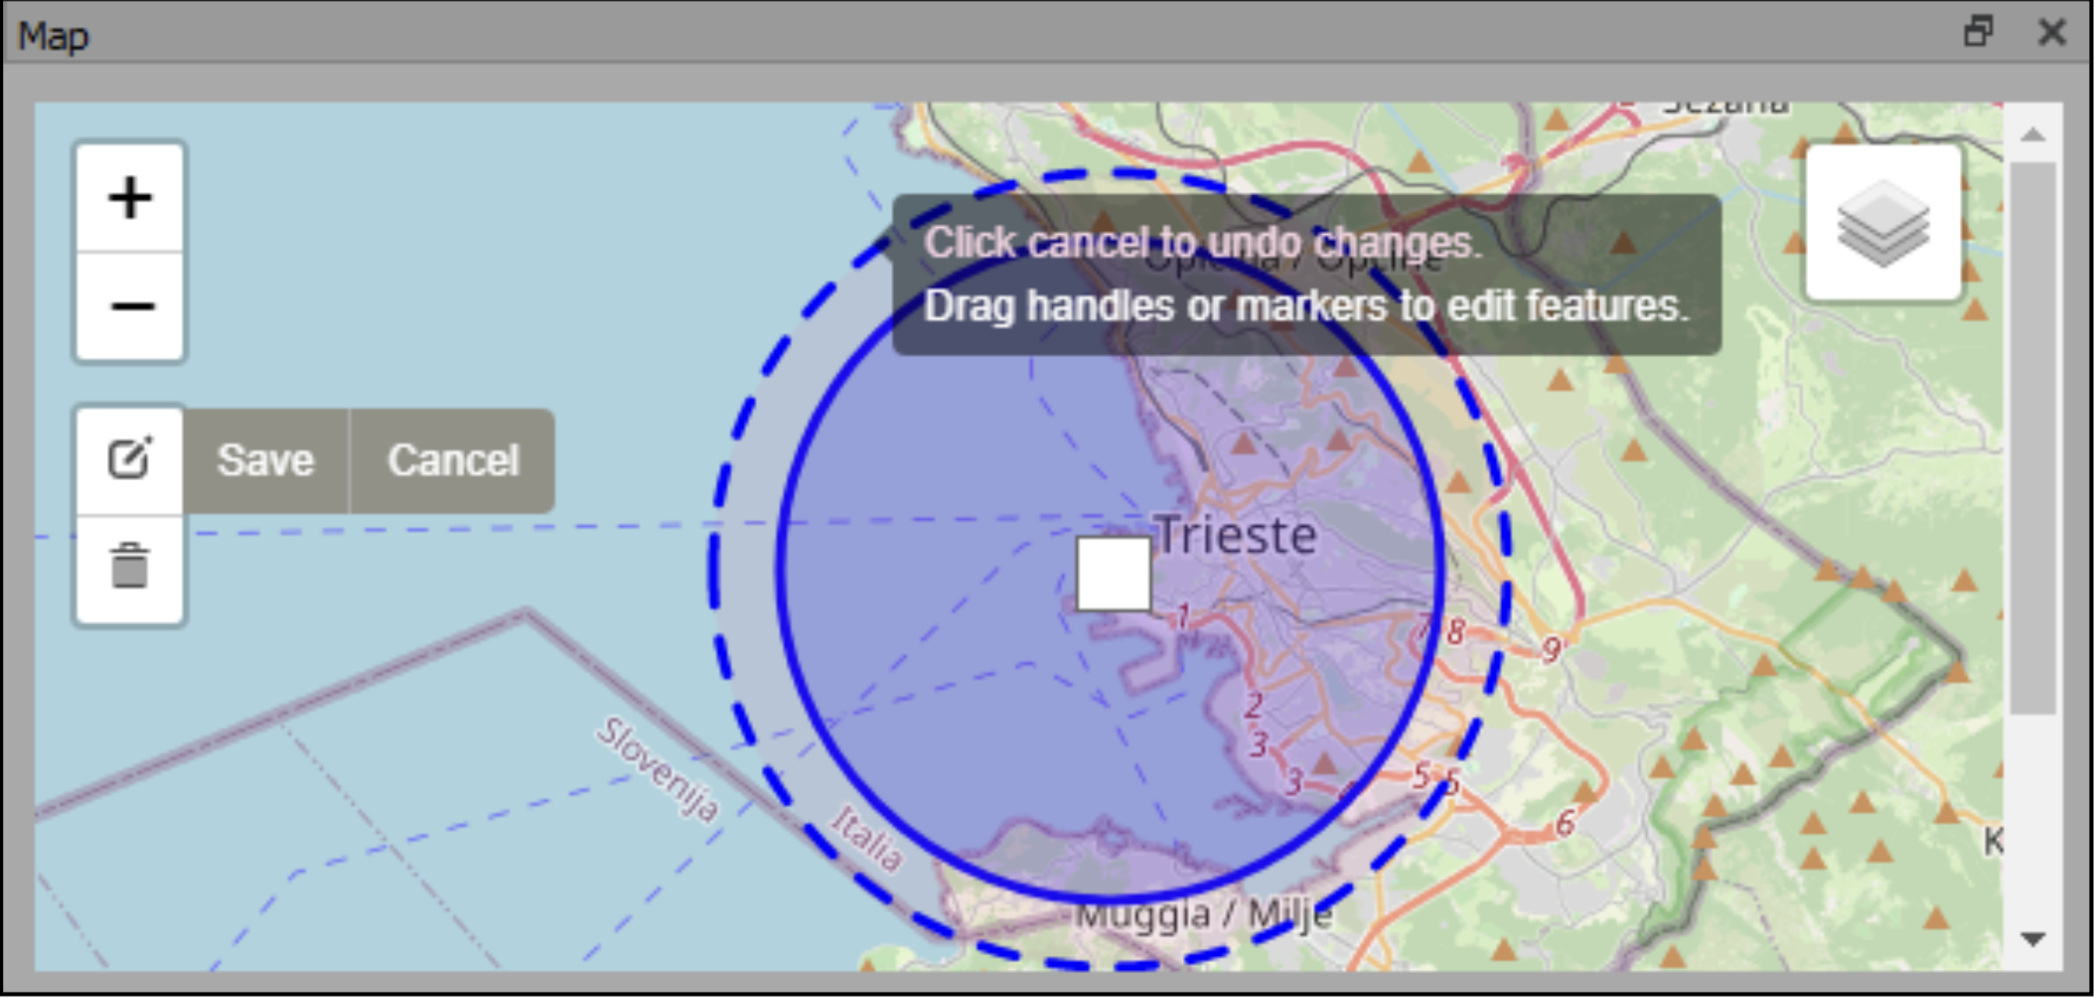
After successfully setting a geofence, you may still edit or remove it from the ‘Map Options’. Enter the geofence by clicking once more ‘Set Geofence’ and select a group. You can adjust the geofence size and location by clicking on ‘Edit Layers’ and dragging the marker in the center or circle bounds.
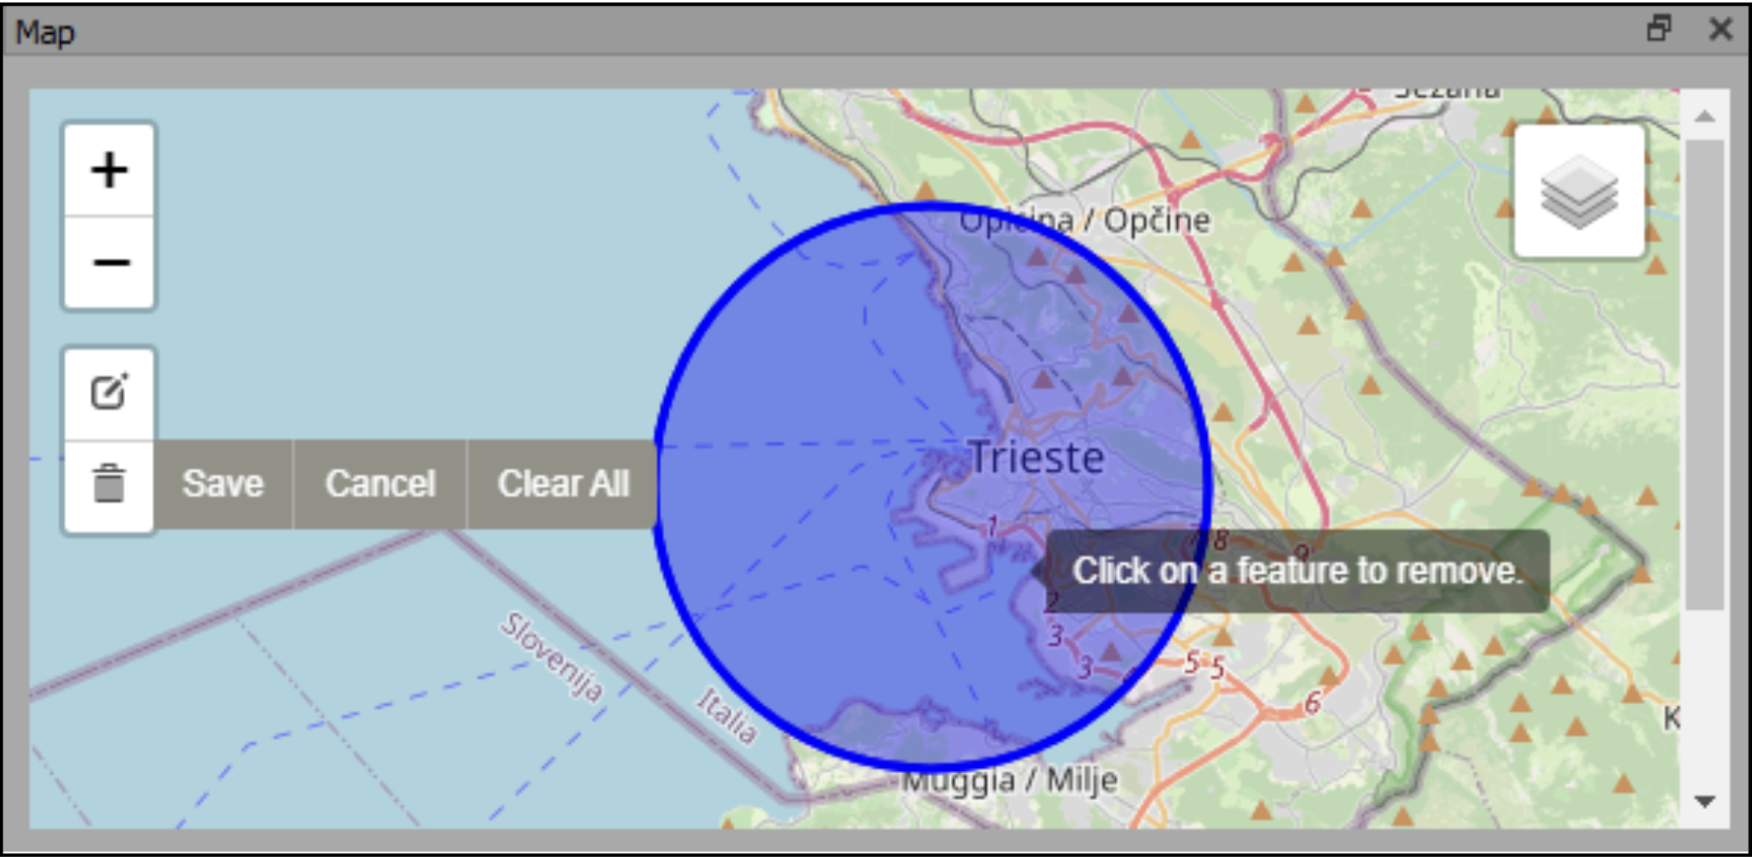
Delete an existing geofence by choosing ‘Delete Layers’ and clicking on the geofence circle on the map. You may also remove the existing geofence by clicking on ‘Clear all’. Always remember to click ‘Save’ and ‘OK’ before exiting the area to update new changes.
¶ Location History
See the current location and past movements of a selected user by exposing the marker on the map. The easiest way to do this is right clicking on the user from the users list or group member list to open up a dropdown menu and selecting ‘Pan to’. The panned user will be displayed and centered on the map immediately.

You can see not only the current location of the field user, but the whole location history as well. Activate the location history tracking view by clicking on ‘History’ from the ‘Map Options’ field. This will automatically activate two additional columns on the users list: ‘Tracks on map’ and ‘Distance travelled’.

To begin location history tracking, specify a time slot from the ‘Map Options’ field; default option is from 1/1/2000 until the current moment. Next tick the box ‘Tracks on map’ from the users list and select ‘GPS Accuracy Threshold’ from the map (default 500). The program will then draw the movements of the selected user within the time slot on the map. Move the track marker, on the bottom of the map, left or right to wind the movement route back or forth. See the date and time of a specific position from the information panel on the left. Place the cursor on top of a GPS track to see location details. Hide all the movement tracks by clicking ‘Clear Tracks on Map’ from the Map Options.
Click on ‘Calculate Distance Travelled’ to study the total distance of movements in between the selected time slot. The traveled distance of each user will be displayed on the users list in meters.

¶ Replay
The replay field represents the PTT application’s talk history section. The most recent audio message is always displayed on top of the list. Scroll down to see older audio messages. The replay list is always group or user specific. Choose a group from the group selection or activate one-to-one mode, to see and replay other messages in the domain.
Each audio message includes the following information: call date, time, originator details (User Name), recording duration, and the message. Recordings can be replayed at any time by clicking on the ‘Play’ button from the ‘Recording’ column. Click on the ‘Stop’ button if you do not wish to listen to the whole audio message. Otherwise the message will automatically play until the end.


¶ Tools
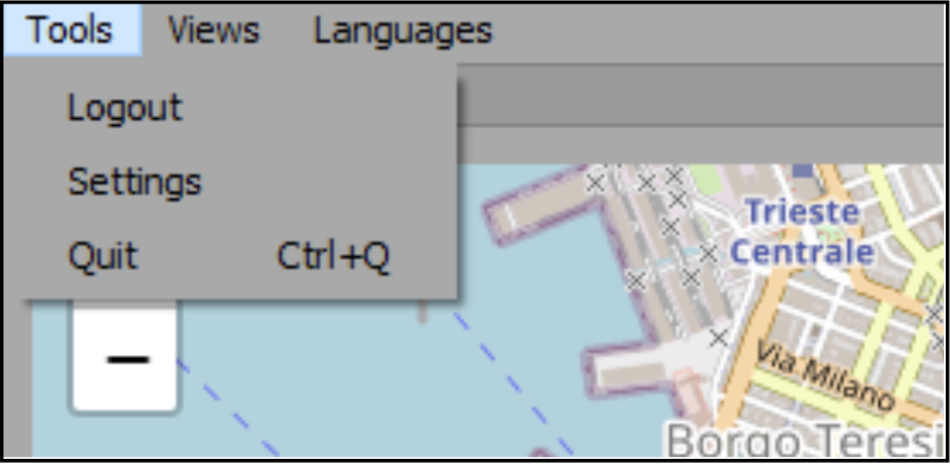
In addition to the previously mentioned basic features, you may also adjust interface, audio and encryption settings of the dispatcher program. Open advanced tools by clicking on the ‘Tools’ tab on the top left corner. A dropdown selection will open up as seen below.
¶ Logout
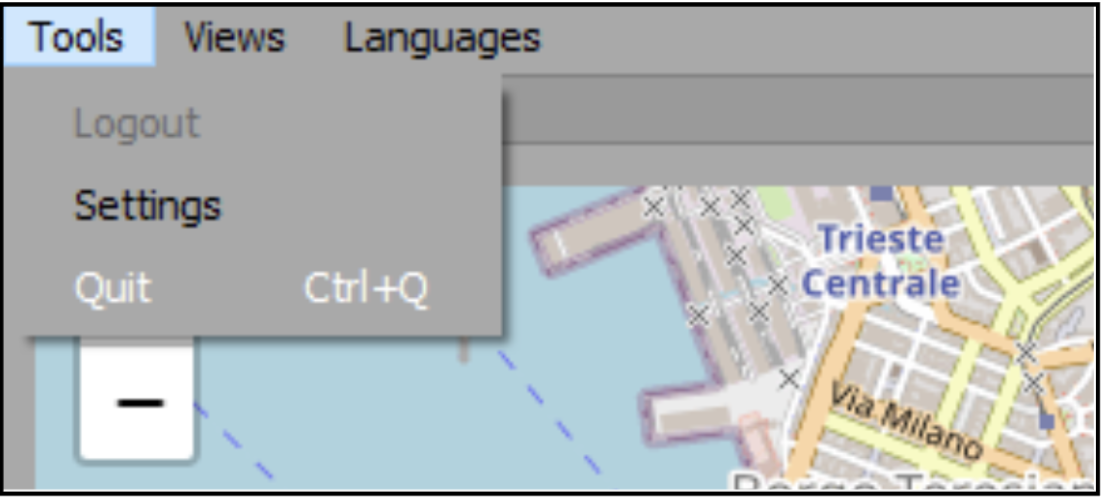
Click ‘Logout’ to sing out from the currently active dispatcher account. All the user and group information within the domain will disappear from the main view. Click on the PTT button to automatically re-login into the same account, without a need to enter the login details again.
Always remember to logout from the program when leaving your computer unguarded or if a person outside the team is present in the room, to protect your company and the privacy of the field users. Remember, that whenever you are logged in, people in the same room will still hear the incoming audio calls with or without a direct line of sight to the screen.
In case you leave the computer and exit the room, you must not only logout from the Dispatcher, but also lock the screen or remove the login details from the program. It is your personal responsibility to respect and practice thorough data privacy and security guidelines of the company or region. In case of doubt, please ask your supervisor to clarify the company’s data protection policy.
¶ Quit
Exit the dispatcher program by either clicking ‘Quit’ from the drop-down selection of ‘Tools’ or alternatively using the fast command Ctrl+Q. However, closing the program does not logout the current dispatcher account. When re-starting dispatcher, the program will automatically remember and login the previously used account. If another person has access to the same computer, remember to empty the login fields from Tools>Settings>Main, and click ‘OK’, before logging out and quitting the program.
¶ Settings
¶ Main
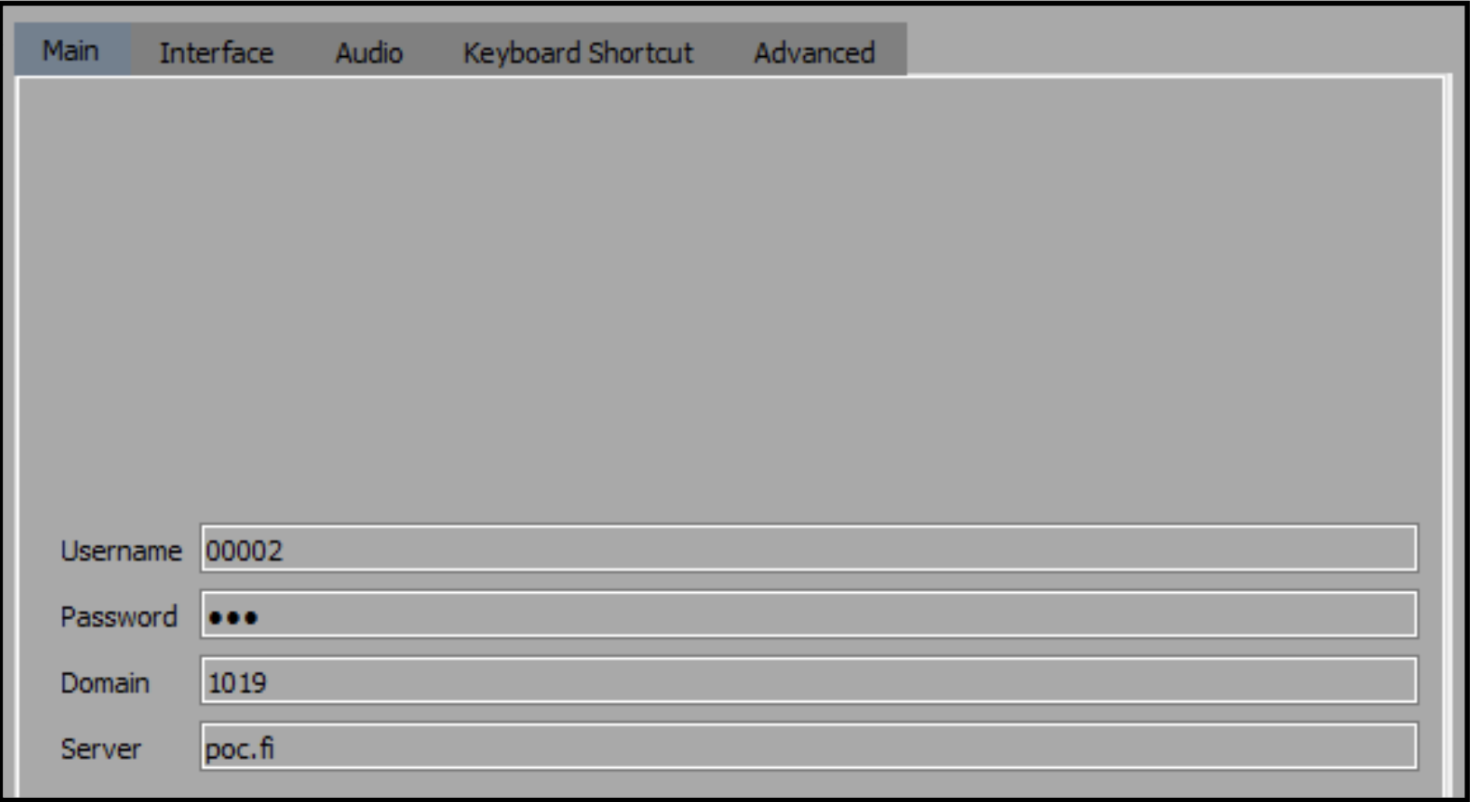
Tools > Settings > Main
If you want to login with another account, first logout from the current account, and then navigate to ‘Tools’ and ‘Settings’. Clear the fields and enter new Username, Password, Domain and Server address. Confirm by clicking ‘OK’ and then ‘Login’ (PTT button) from the main view.
¶ Interface
Tools > Settings > Interface
Navigate to Interface settings and tick the box ‘Show Offline Users’ to display the users that are not currently using the PTT application. Offline users will be indicated with a gray dot under the group member list. If the ‘Show Offline Users’ is not selected, only available users will be listed on the group members list. User list field on the right hand side is not affected by this setting.

Click on the ‘User Sort Order’ dropdown selection to choose how the group member list is organized. The list can be sorted by the user name (alphabetical order) or by the most recently spoken user. If you select ‘Last Spoken’, the most recently spoken PTT user will always appear on top of the group member list. Finally, you can adjust the program font size from the dropdown selection (default 8). The font size will update upon the next program restart.

¶ Audio
Tools > Settings > Audio
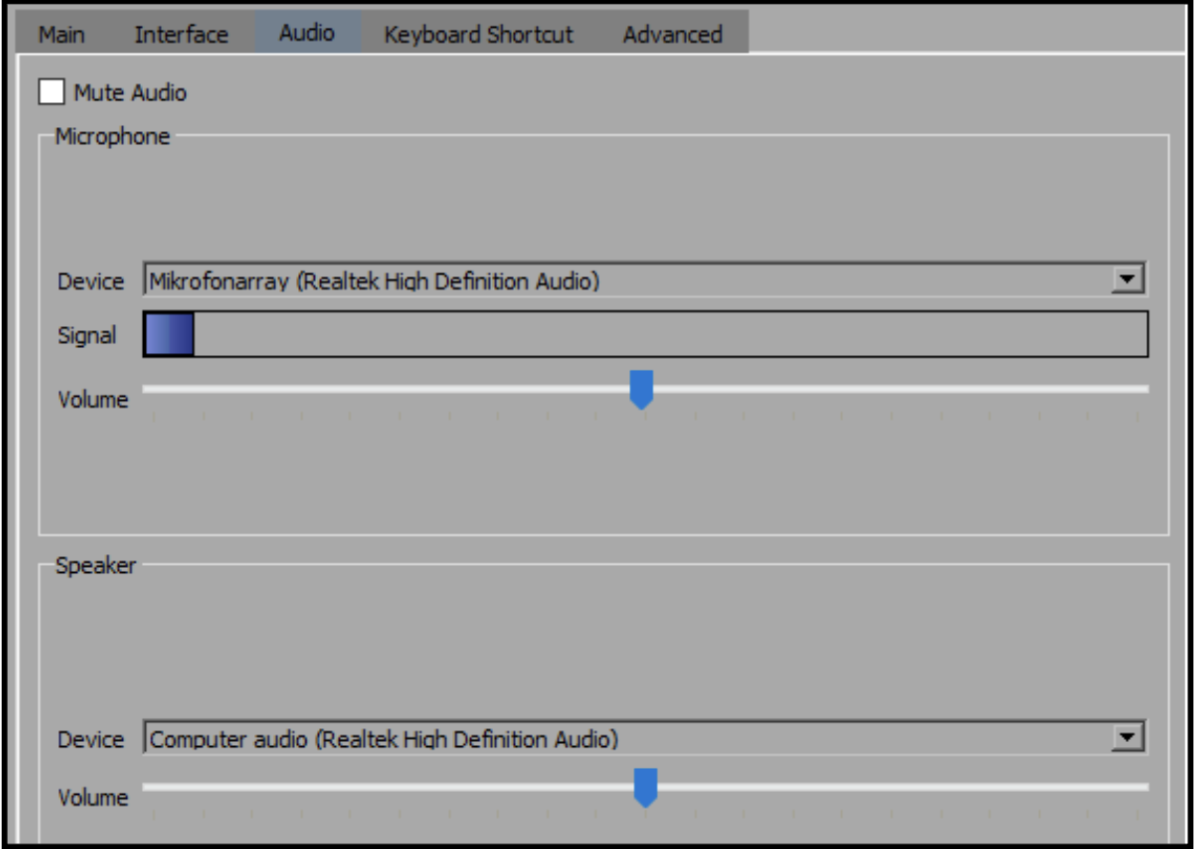
Adjust the program audio by clicking on the third tab bar of the settings: Tools>Settings>Audio. Tick the box ‘Mute Audio’ to silent all audio calls within the domain.
Change the program microphone or speaker from the available options by clicking on the dropdown selection next to ‘Device’. The signal bar indicates the level of the volume in dark blue color in real time. Adjust the microphone and speaker volume level by moving the marker horizontally. Save the adjusted settings by clicking ‘OK’.
You may also silence a specific group or a user in the group from the group member list. Right-click on the group name to open a dropdown selection and click ‘Mute Group’. Unmute the group by clicking either ‘Unmute Group’ or ‘Clear all Mutes’. The latter option will remove all group mutes. Mute a user in a group by right clicking the name from the group member list and selecting ‘Mute User in Group’.

¶ Keyboard Shortcut
Tools > Settings > Keyboard Shortcut
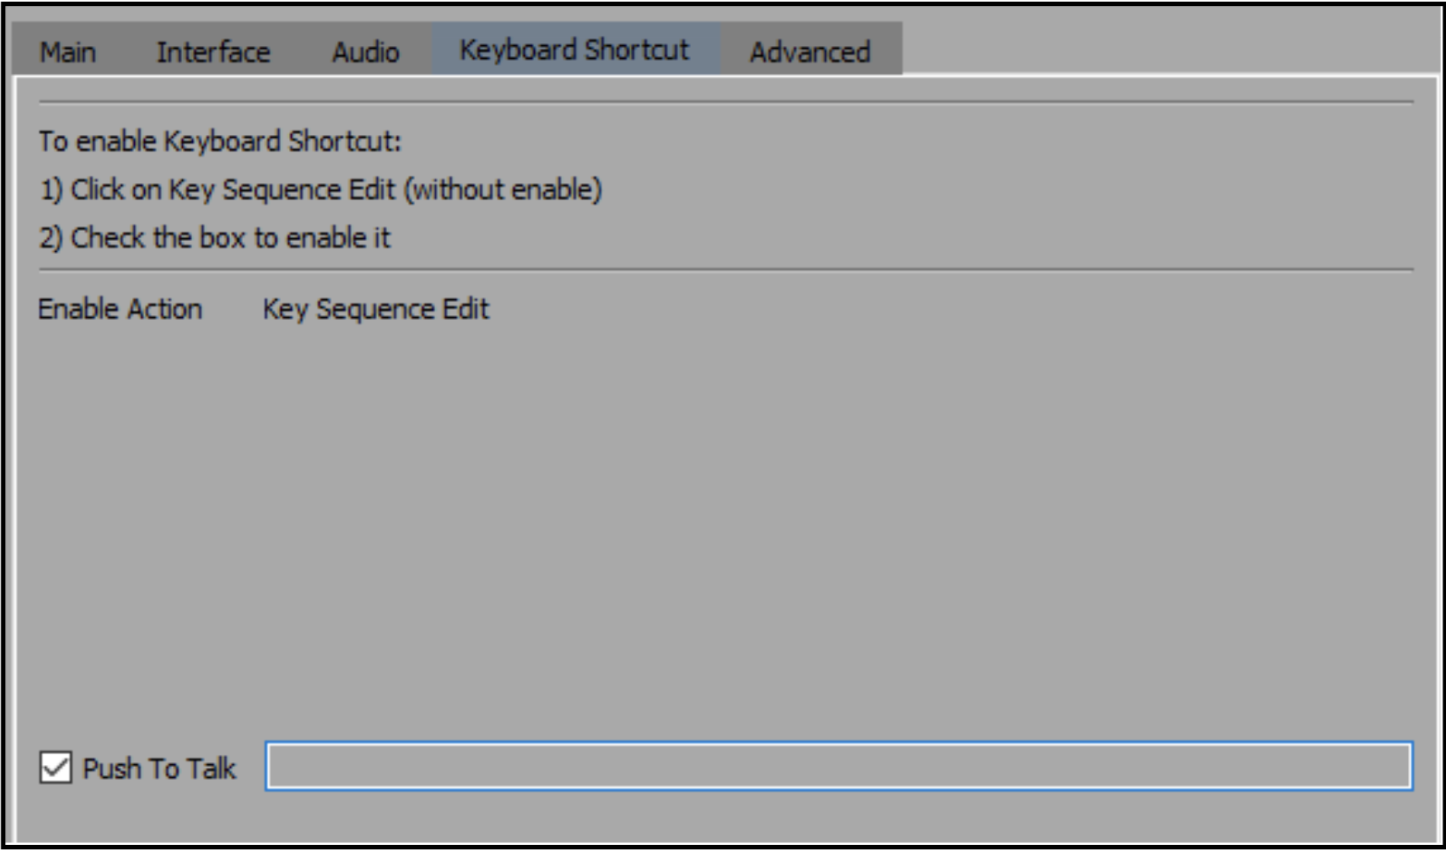
You can add or modify certain shortcuts for the dispatcher program from the ‘Keyboard Shortcuts’ settings. Tick the desired box indicating the action and insert a shortcut in the field on the right side. Click ‘OK’ to save the settings.
¶ Advanced
Tools > Settings > Advanced
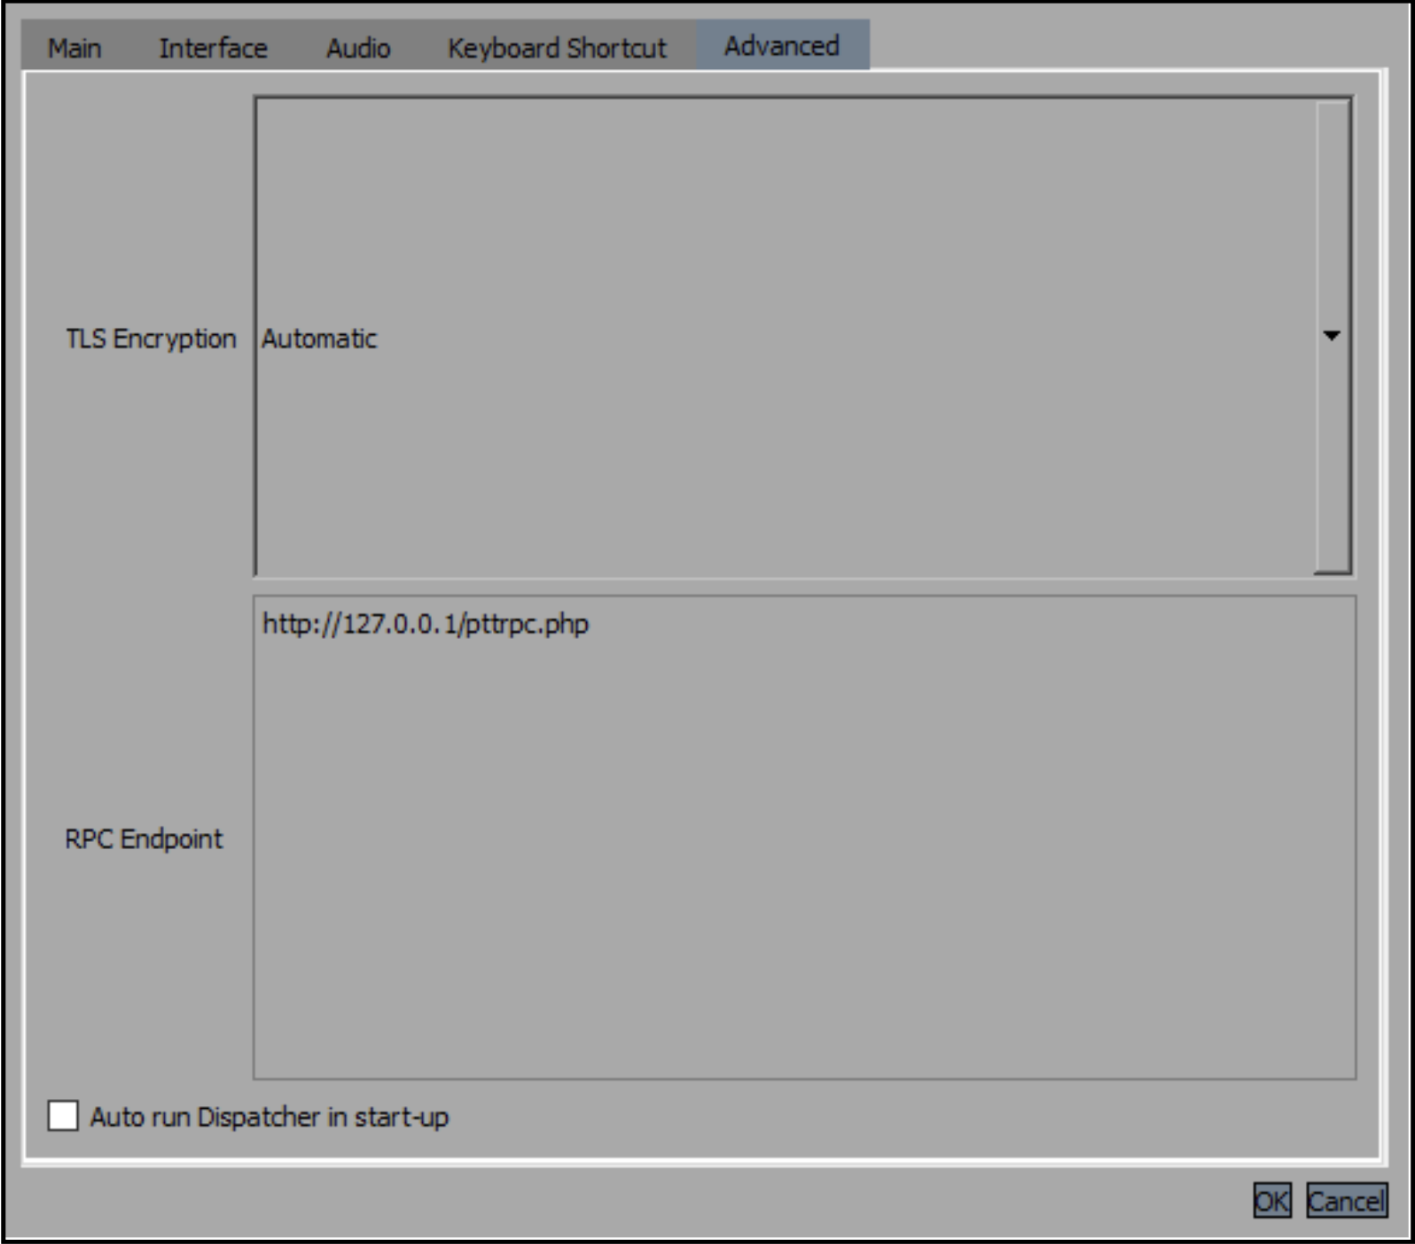
You can choose the program TLS Encryption type from the fifth tab bar: Tools>Settings>Advanced. Options are Automatic (as default), Force TLS, and Force Unencrypted. Confirm the selection by clicking ‘OK’.
You can also find the RPC Endpoint address, a network-specific address of a server process, from the advanced settings.
Tick the box ‘Auto run Dispatcher in start-up’ and confirm setting by clicking ‘OK’ to automatically start the program when restarting your computer.
